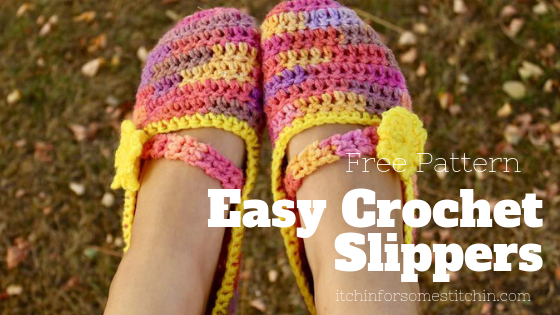
Today I want to share with you my very first easy beginner crochet slipper pattern!
This is only one of six slipper patterns that I plan to make.
That’s one for each of the four girls in the house, my husband, and my little boy.
*This post may have affiliate links. See my full Disclosure Policy for details.
You see, there is a bucket of slippers right inside the door at my house.
The door opens, your shoes go off, and slippers go on your feet.
However, our slippers are now becoming worn out and ratty looking.
So, I decided to crochet my own!
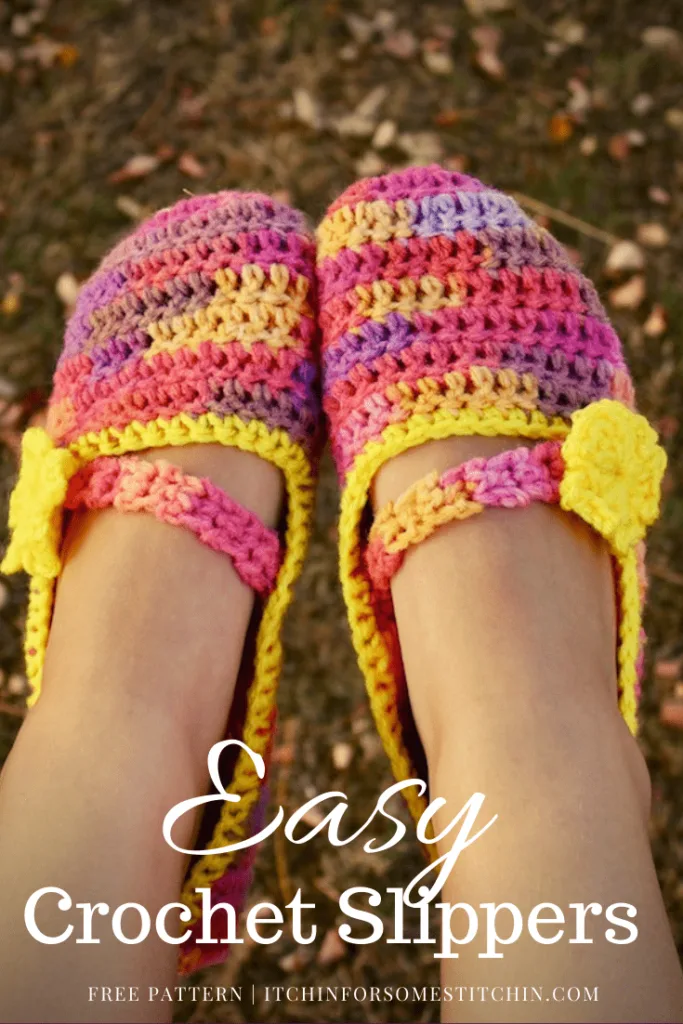
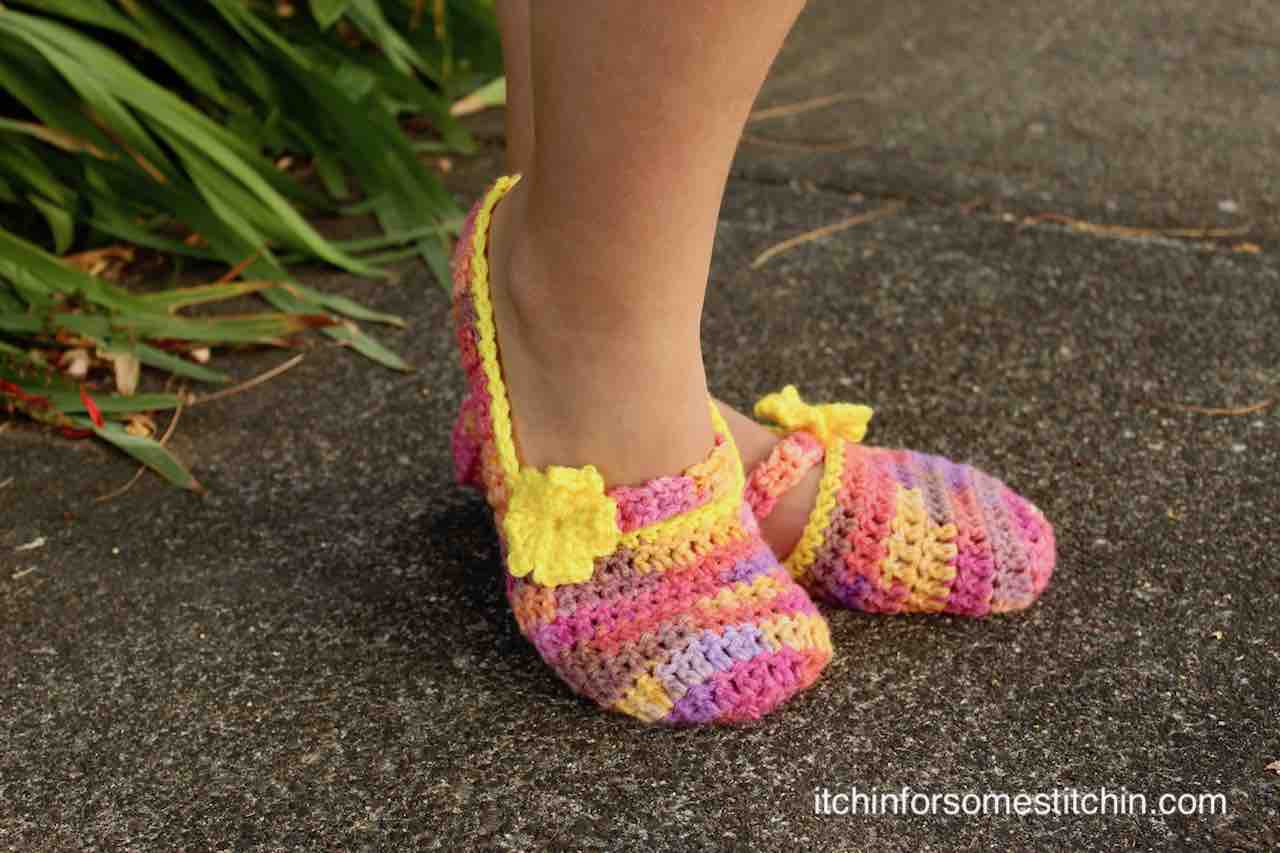
This one was originally designed with my daughter Kassidy in mind.
One down, 5 to go!
Now, this easy crochet pattern ultimately became a universal one suitable for US women’s shoe size 6/6.5-11 (also for EU and UK women’s shoe sizes per the chart in the pattern), but it didn’t start out that way.
I first designed it for US women’s size 7-8, Kassidy’s shoe size.
Yet, when I put it out for pattern testing, so many people answered the call and requested other sizes!
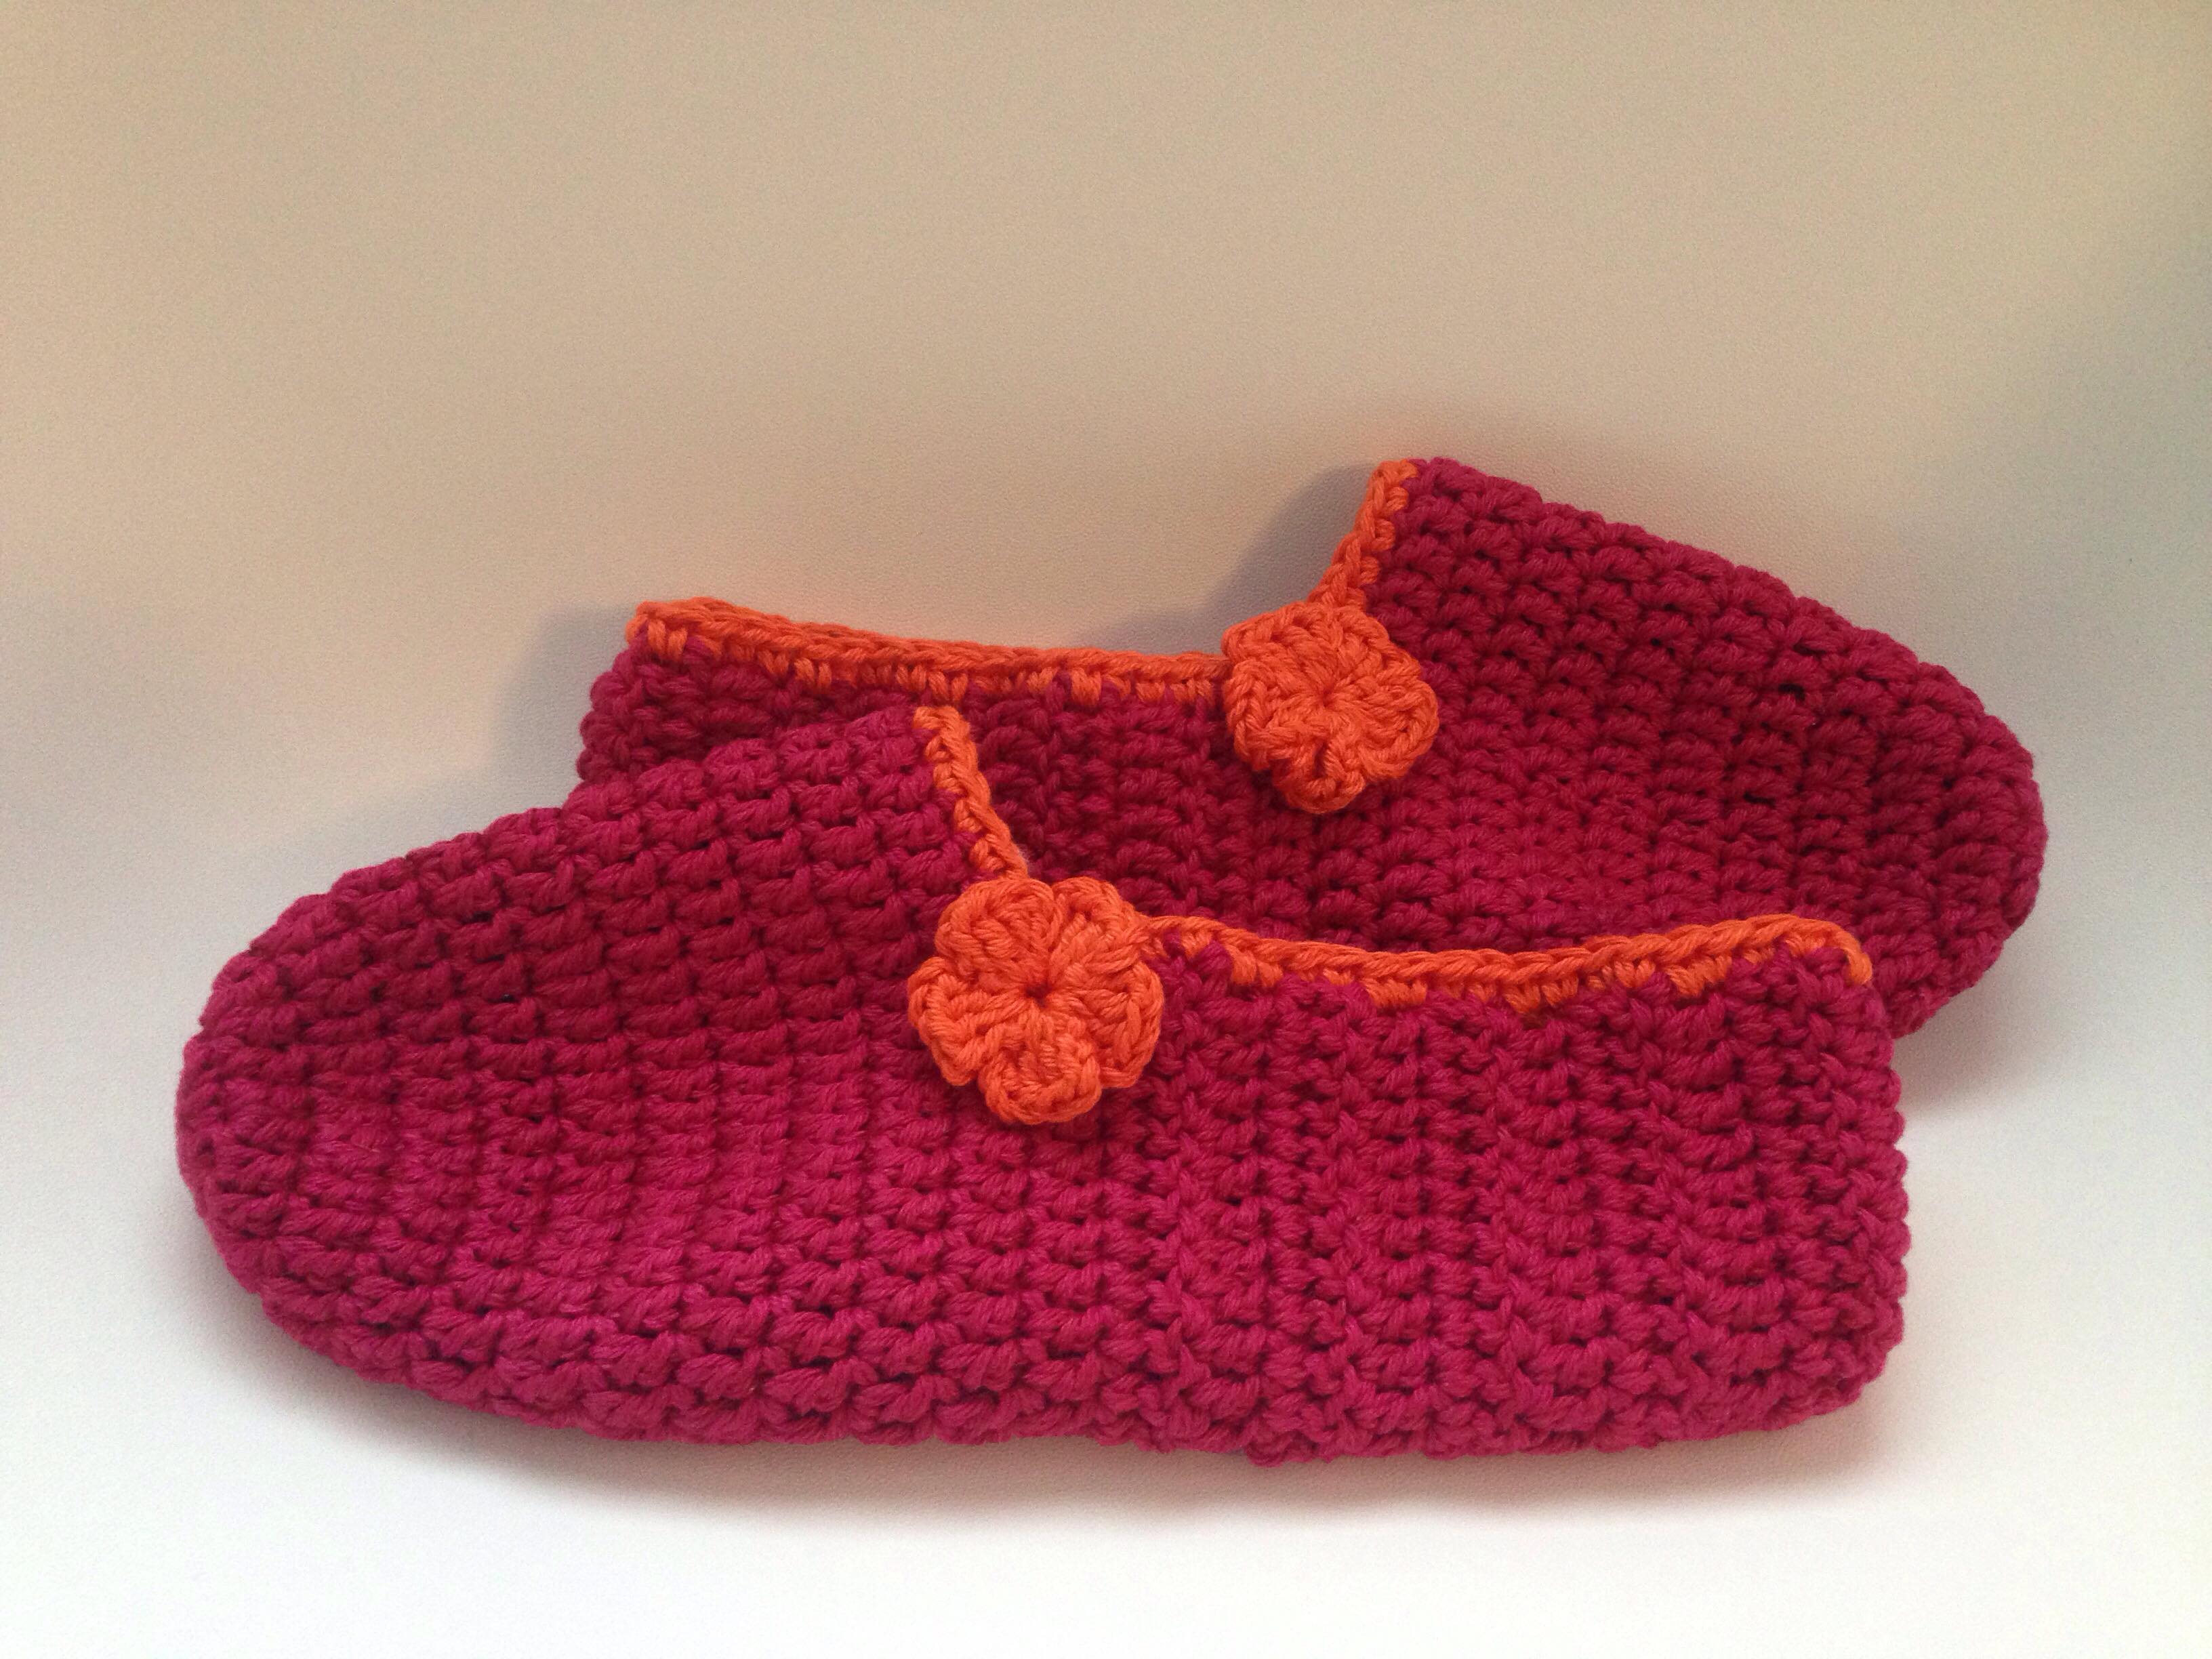
Note: The slippers pictured above were crocheted by one of my wonderful pattern testers, Darja Holm of Blomst Og Krokodille
Let me tell you, folks, redesigning it as a universal pattern was tough and you may still need to make some personal tweaks to make it suit you perfectly, but overall I think the pattern turned out lovely!
Plus, it’s really not that hard once you get into the groove.
Check Out These Other Patterns I LOVE!
How to Crochet Easy Beginner Slippers for Women
**THIS IS AN ORIGINAL PATTERN. Please see my Copyright Statement for details.
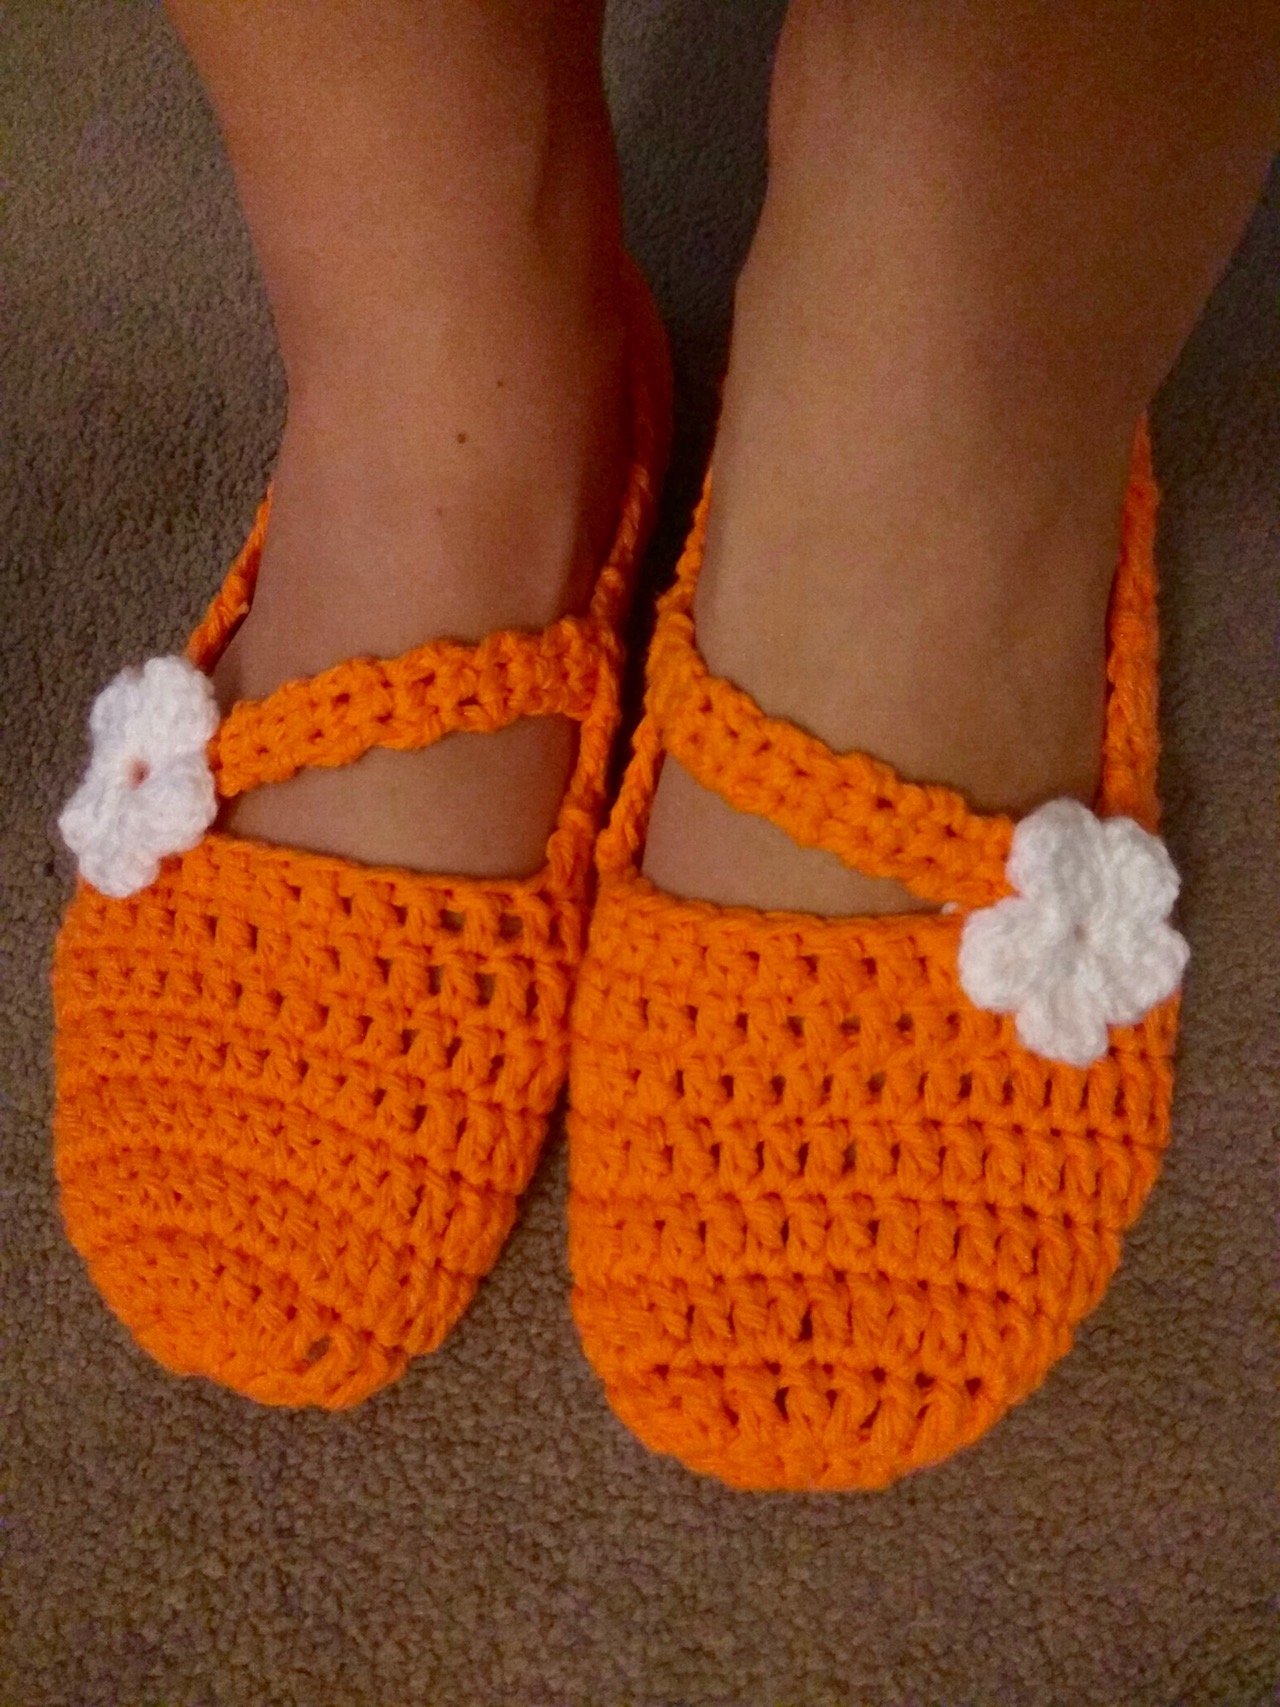
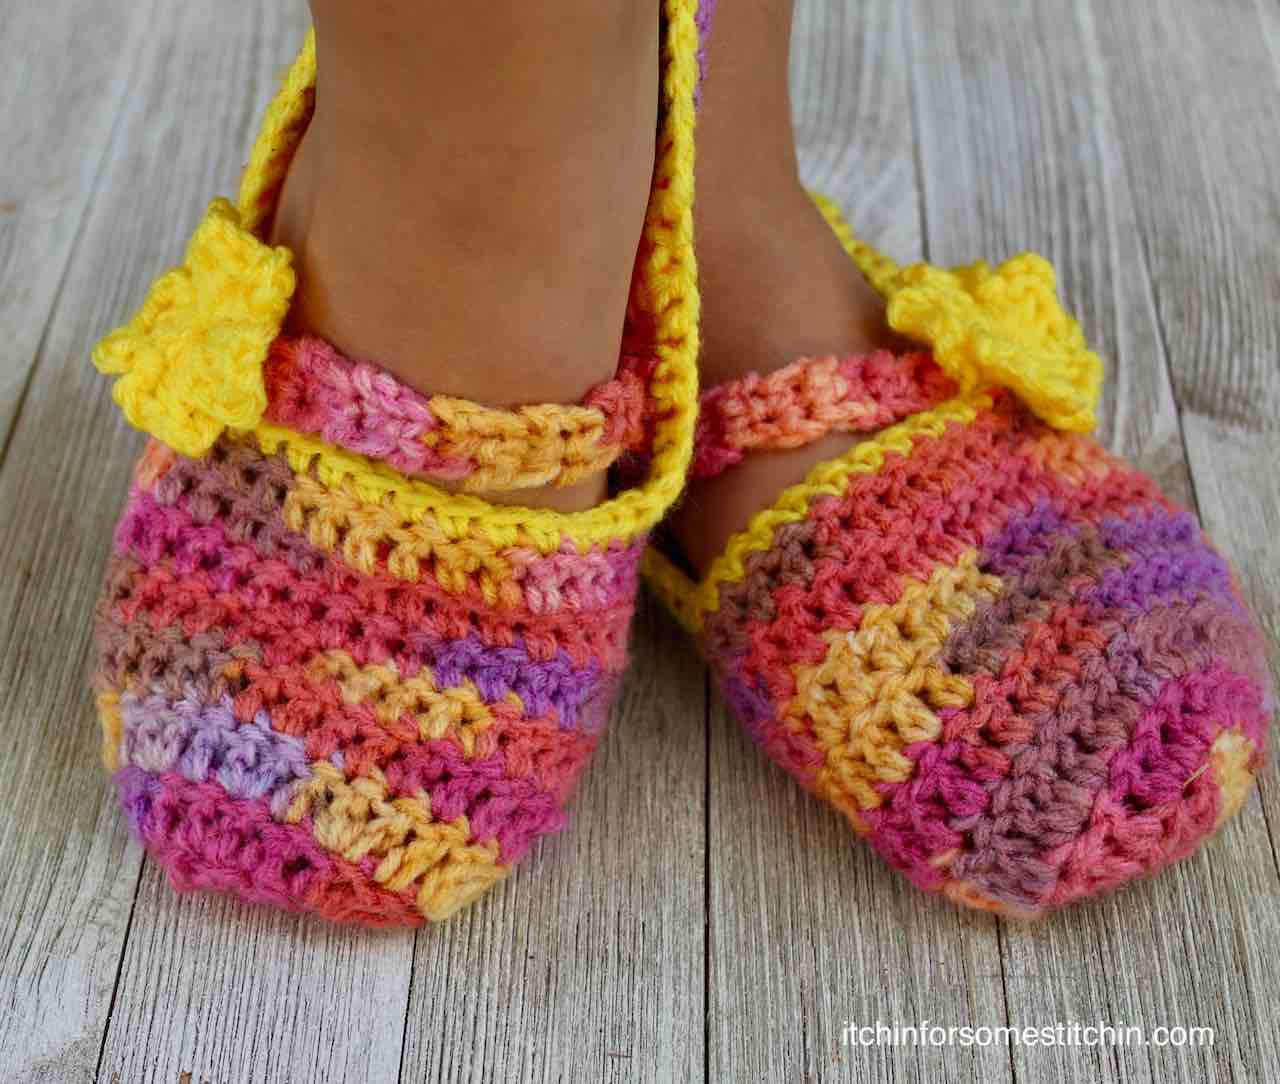
Note: The slippers pictured above were crocheted by another one of my wonderful pattern testers, Kate Shultz.
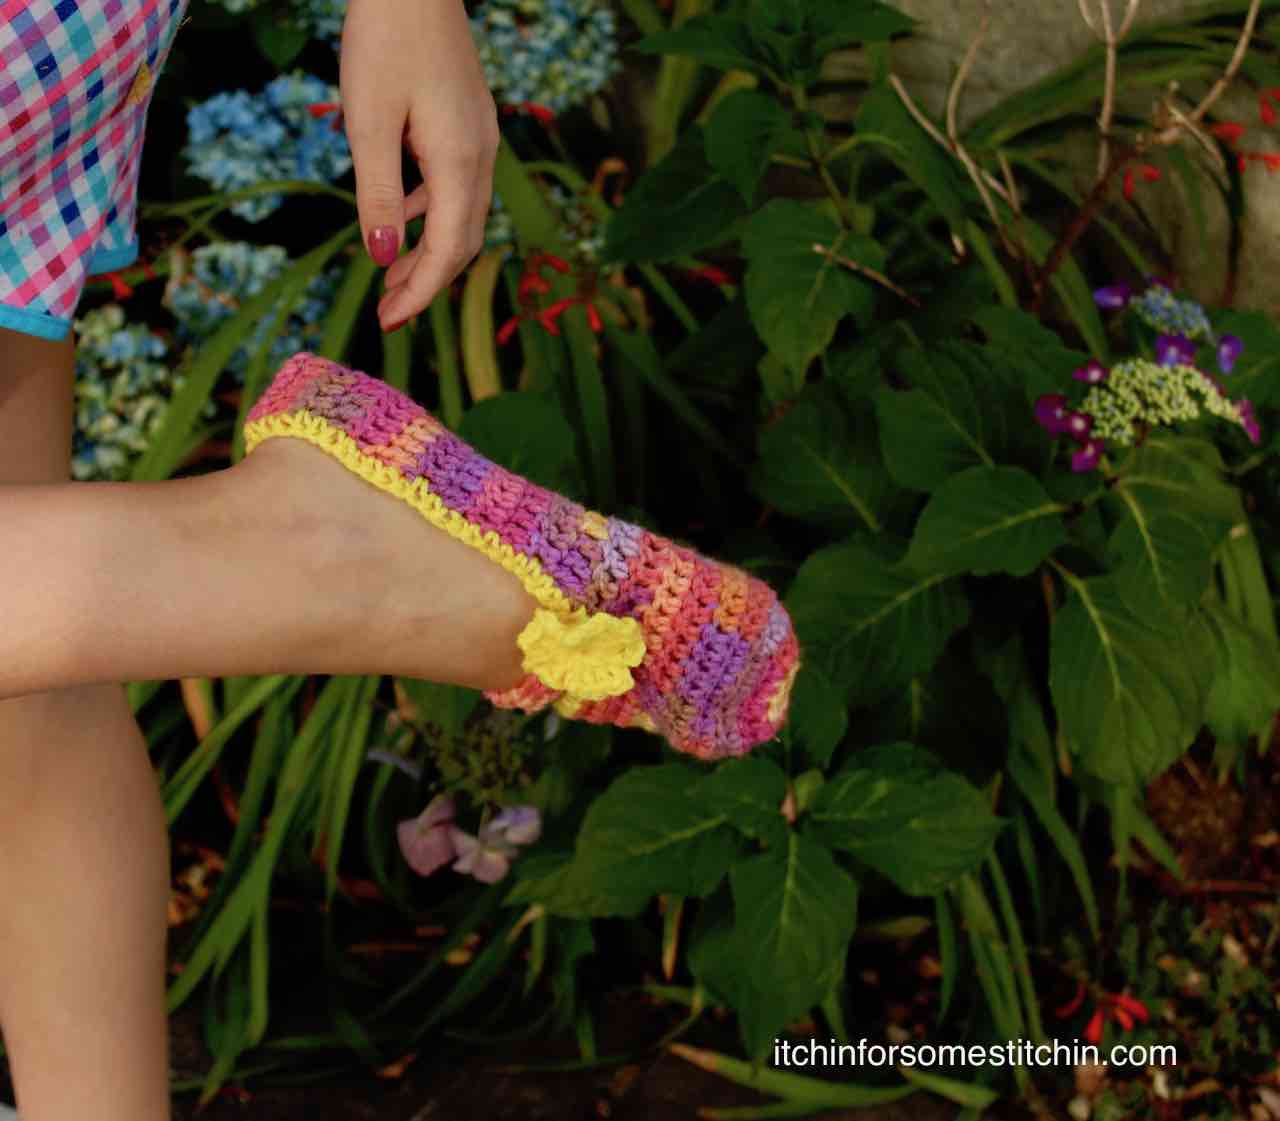
One thing that amazes me is how different each pair of slippers can be depending on the yarn colors and embellishments you choose.
From solid to variegated yarns to buttons or flowers, each set of slippers can truly be one of a kind.
So, grab your yarn and hook, and before you know it, you’ll have a set of awesome slippers that are as unique as you!
Prefer a PDF?
This pattern is available as a large print, ad-free, printable PDF pattern.
Get it in one of these places!
Love Pinterest? I do!
PIN this pattern to your Pinterest boards for later HERE. You can also follow all my boards!

Summary:
These easy crochet slippers are designed in multiple sizes for women ( US, EU, and UK) so that any lady can have a comfortable and fashionable set of slippers to wear around the house. Beginner friendly and easy to customize for that perfect fit. Choose your favorite yarn and embellish them with a sweet crochet flower (pattern included), a button, gem or any other adornment to create a look that’s all your own!
Difficulty level: Level 1 – Beginner
Finished Dimensions:
All sizes are made to the approximate lengths according to the chart below.

NOTE: Chart data from Infinity Shoes
Gauge: 16 stitches and 9 rows = 4-inches in double crochet
Materials:
- worsted-weight (4) yarn
- Crochet Hook size G/8 4.0mm (I use a hook made by Nelsonwood, see my complete review HERE)
~ Total yardage for this pattern is 25-50 yards or less.
(Click HERE to find my favorite crochet tools & resources)
Abbreviations:
The pattern is written in US terms.
Stitch/es (st/sts)
dc2tog – double crochet 2 together (also called a dc decrease)
Additional Notes:
- Instead of starting with the Magic ring, you could alternatively start using the chaining method (chain 3 then slp-st to 1st chain to make a ring). Both the magic ring and the chaining method are detailed in the “Magic ring or Chaining Method” tutorial HERE.
- The ch3 does not count as a stitch unless otherwise indicated in the pattern.
- Final counts are indicated in parentheses in the following order (6-6.5), (7-7.5) (8-8.5) (9-9.5) (10-10.5) (11)
- All slipper sizes are made to have a snug fit. If you prefer a looser fit, try one size up or use a hook that is 1-2 sizes larger than indicated (like a 5.00 mm or 5.5 mm hook).
- The final stitch counts should create a slipper that conforms to the standards in the above chart under “Finished dimensions”. However, all feet are unique and thus, you may need to add or decrease stitches in Round 2 to create a custom fit. The best way is to actually try the slipper on your foot as it is being made and make the proper adjustments as you go.
Instructions:
Use the Magic Ring or Chaining Method to work the stitches indicated below:
- 11 dc for sizes 6-6.5 and 7-7.5 and
- 12 dc stitches for sizes 8-8.5 and 9-9.5*
- 13 dc stitches for sizes 10-10.5* and 11*
Note: ch3 does not count as a stitch when making the ring and you slp-st to the top of the ch3 to close the ring.
Round 1: Ch3, 1 dc in the first stitch (this is the one with the ch3 attached), 2 dc in the second stitch, *1dc in the next stitch, 2dc in the next stitch*. Repeat from * to * around. Slp-st to the top of the ch3. (16 dc) (16dc) (18dc) (18dc) (19dc) (19dc)
Round 2: Ch3, 2dc in the first stitch (this is the one with the ch3 attached), 2 dc in the second stitch, *1dc in the next stitch, 2dc in the next stitch*. Repeat from * to * to the last 2 stitches around. 1 dc in each of the last two stitches, slip-st to top of the ch3. (24dc) (24dc) (27dc) (27dc) (28dc) (28dc)
NOTE: This is a good place to add or decrease stitches for a custom fit (See Additional Notes).
Rounds 3-5: Ch3, 1dc in each stitch around, slip-st to top of the ch3. (24dc) (24dc) (27dc) (27dc) (28dc) (28dc)
Round 6: Ch 3, dc2tog the first two stitches, dc in each stitch around to the last two stitches, dc2tog the last two stitches, slip-st to top of the ch3. (22sts) (22sts) (25sts) (25sts) (26sts) (26sts)
Round 7: Ch3, 1dc in each stitch around, slip-st to top of the ch3. (22dc) (22dc) (25dc) (25dc) (26dc) (26dc)
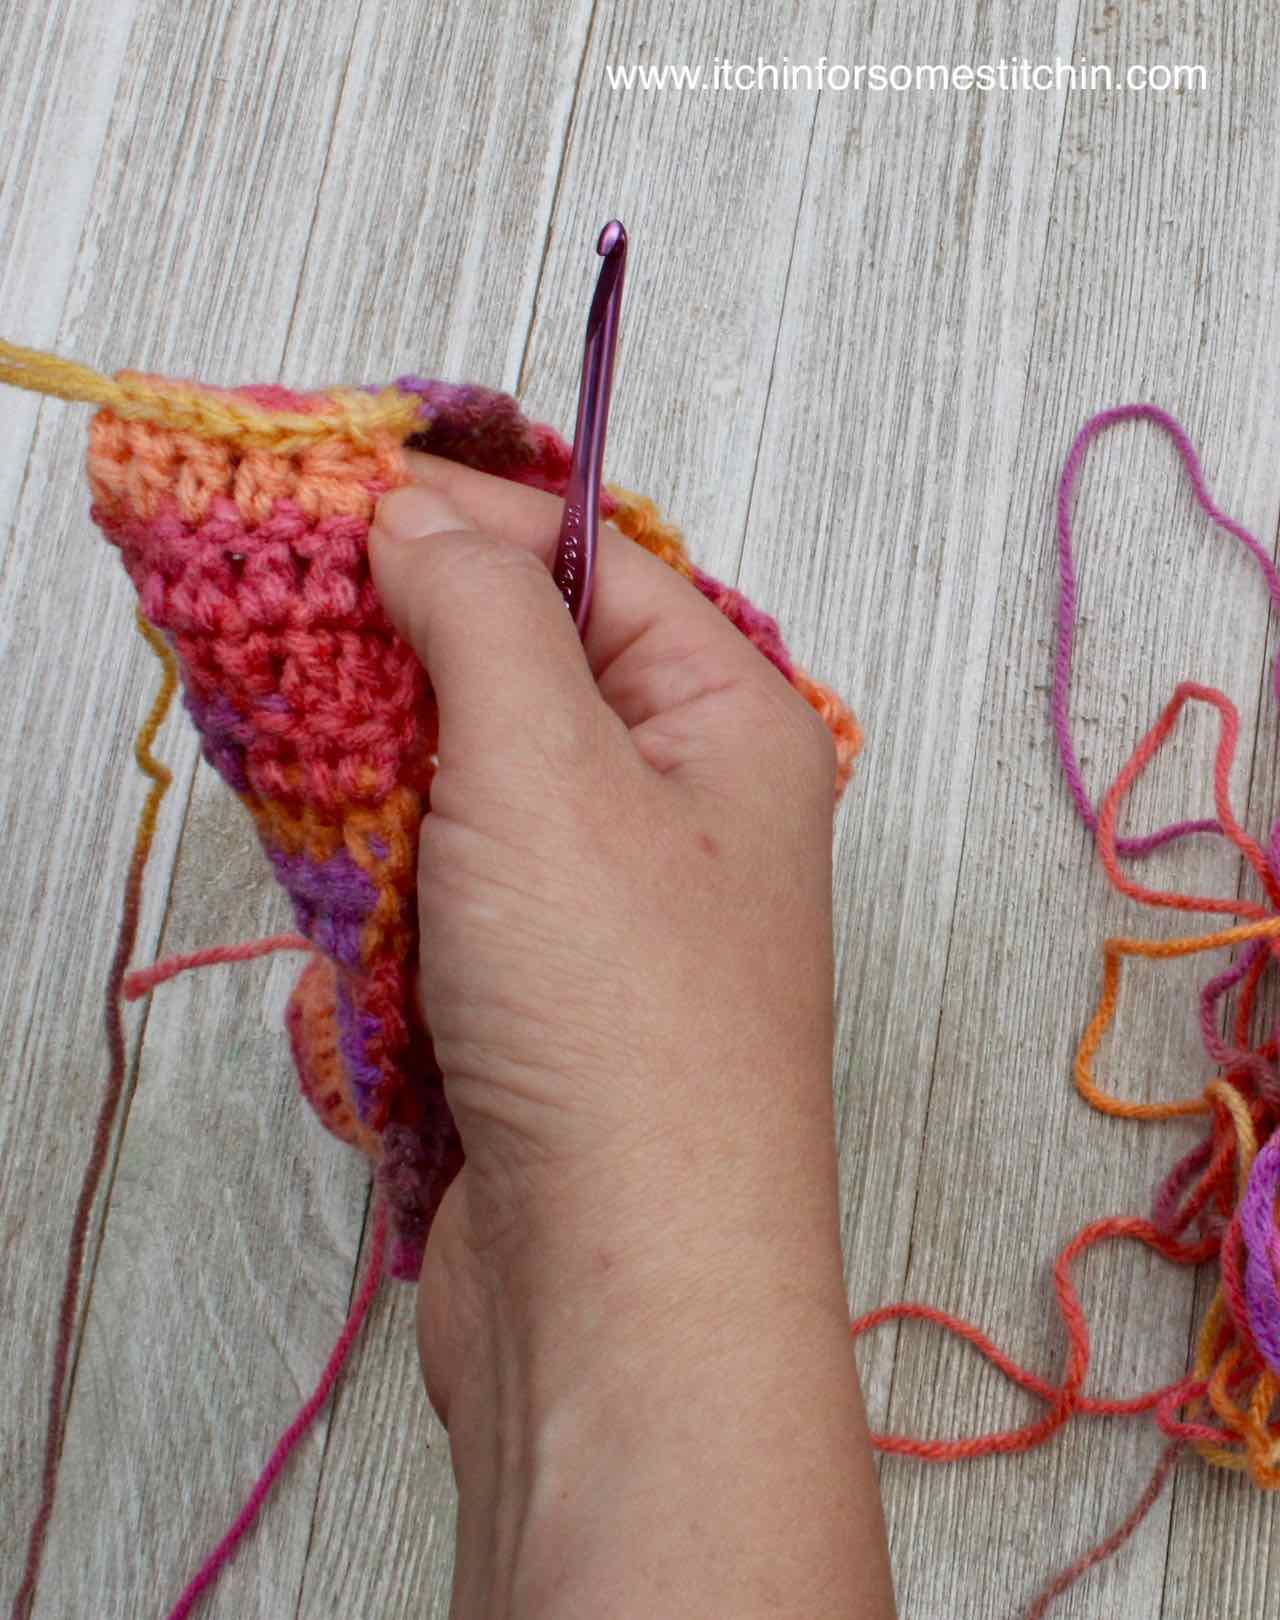
Hold your slipper like indicated in the picture below (with the bottom of the slipper towards you and the opening at the top).
Start from the Ch3 and count an even number of stitches to the left and to the right of the Ch3. Then attach yarn to the furthest stitch on the right using a slp-st.
For example: For size 7-7.5 (pictured), I counted 8 stitches to the left of the chain 3 and 8 stitches to the right of the chain 3. I attached my yarn to stitch number 8 on the right side per the picture below.
This is where you will start forming the bottom and sides of the slipper. How high you would like the sides is a matter of preference.
If you would like them higher, you will need to count more stitches to the left and right of the ch3.
If you would like them lower, you will need to count fewer stitches to the left and right of the ch3.
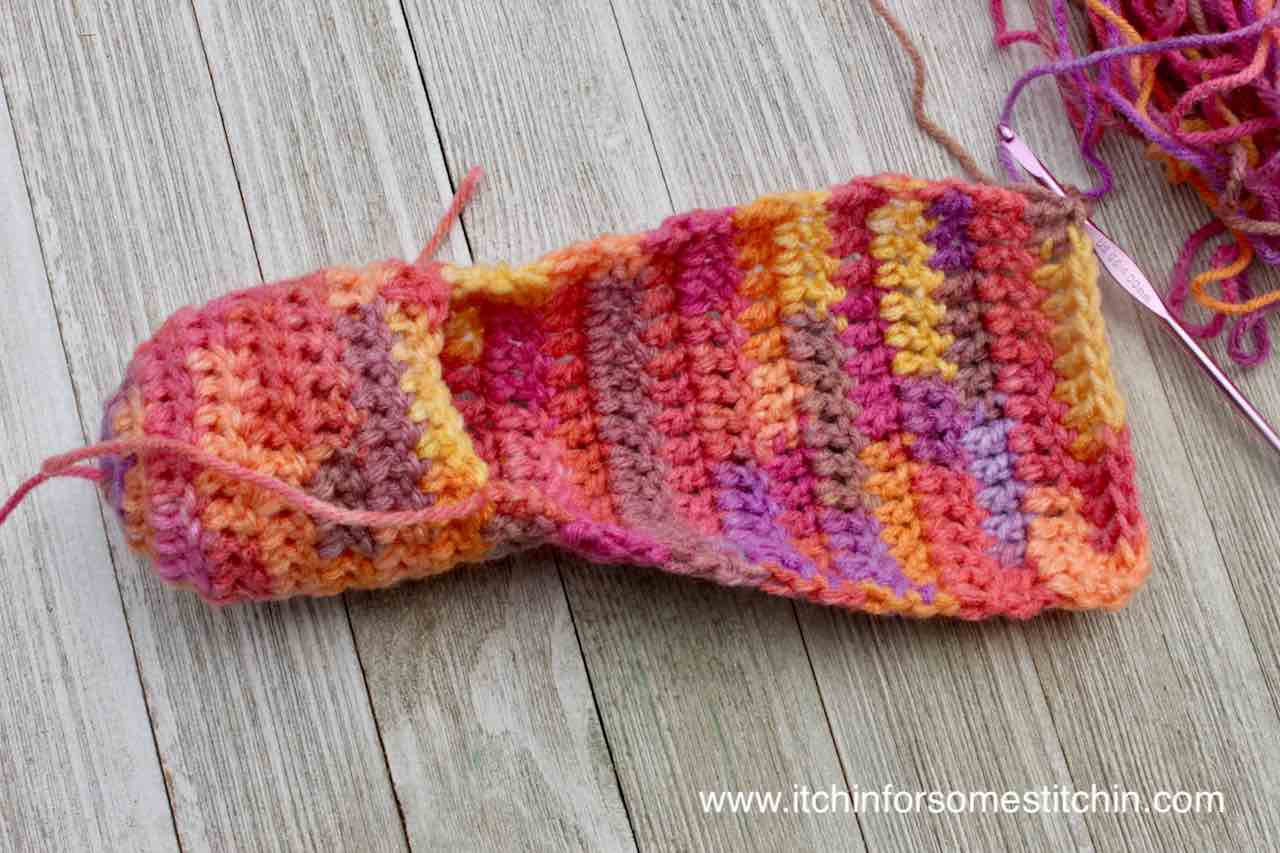
The rest of the pattern is worked flat not in rounds.
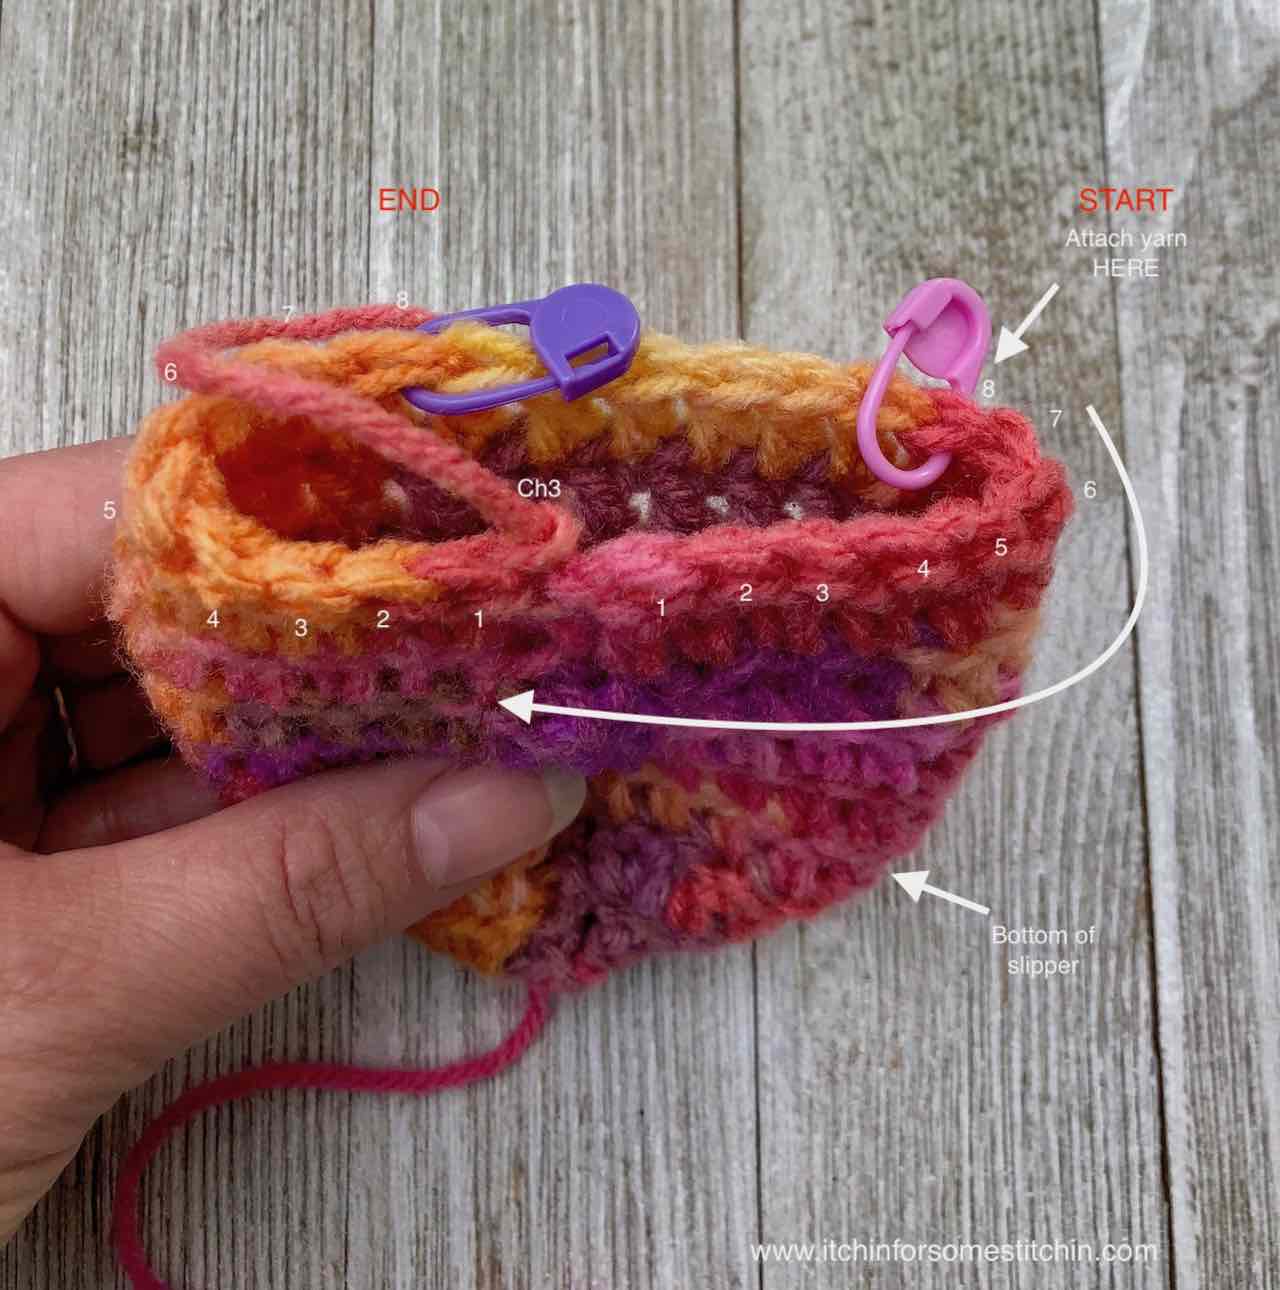
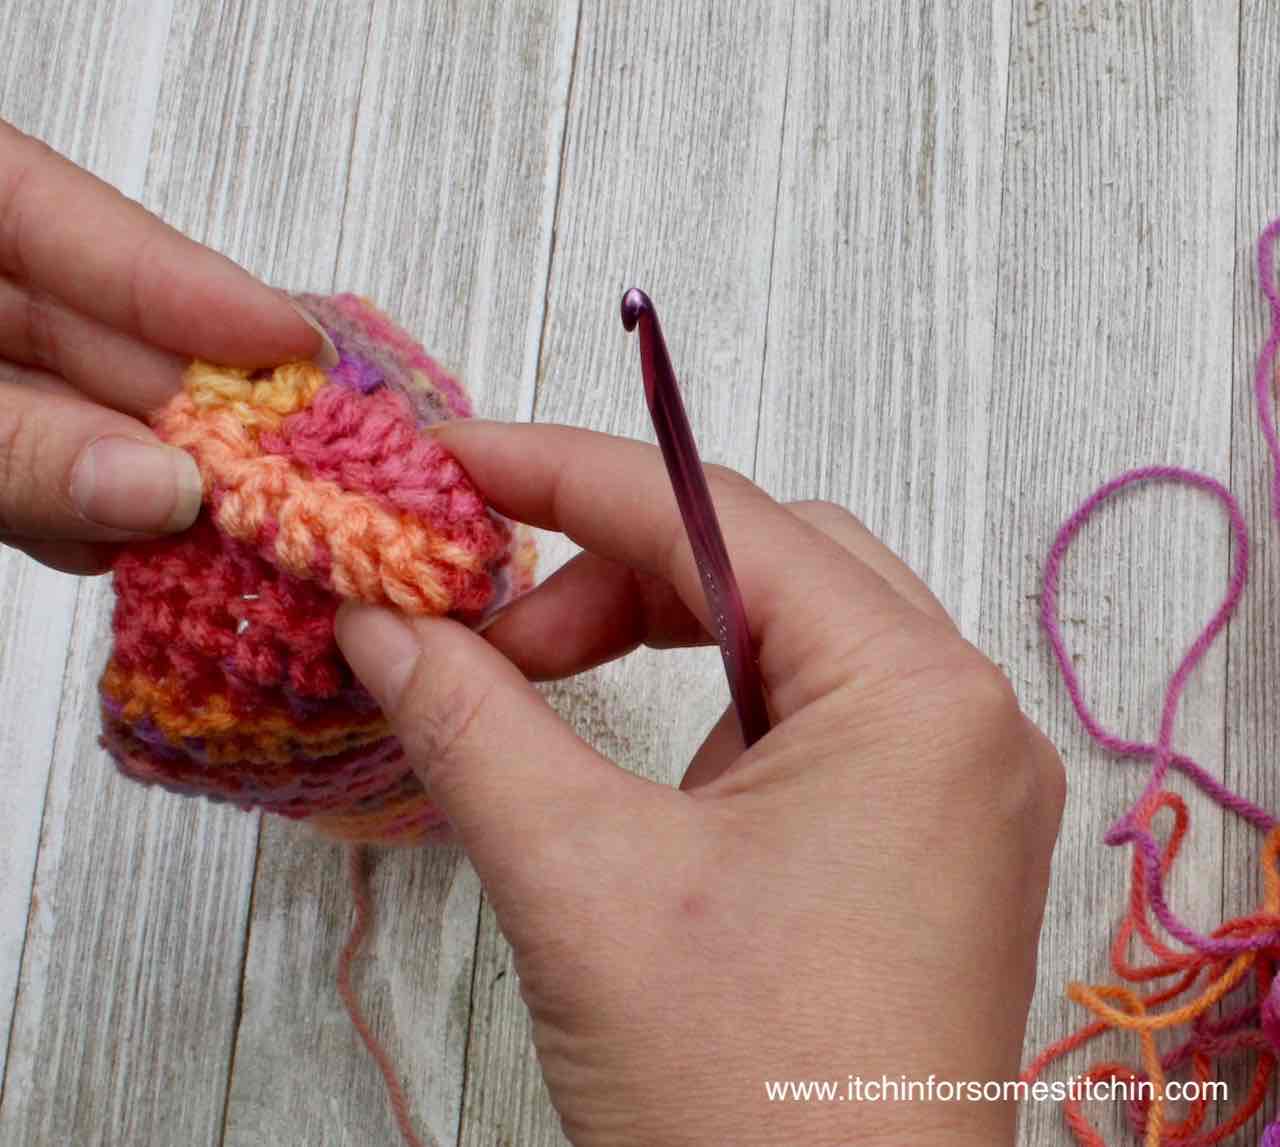
Row 8: Ch2 – do this in the same stitch you made the slp-st. This Ch2 counts as the first dc. Then, moving to your left as indicated by the arrow in the picture above, dc in the number of stitches for your chosen side height.
Just make sure you have an even number of stitches on each side of the ch3.
You will skip over the ch3 in the middle.
For example: For the size 7-7.5 slipper, I counted 8 stitches to the left. So, I also want 8 stitches to the right for a total of 16 stitches. Since the ch2 counts as a stitch, I would dc in the next 15 stitches – this would give me a final stitch count of 16 with 8 stitches on each side of the ch3.
Take note of your final stitch count.
_________________________________________________________________
For size 6-6.5 only
Rows 9-14: Ch2 (counts as one dc), turn work, skip the first st (the st with the Ch2 attached), dc in each stitch across and in the top of the Ch2 from the previous row.
-final stitch count should match your final stitch count from row 8.
_________________________________________________________________
For size 7-7.5 only
Rows 9-15: Ch2 (counts as one dc), turn work, skip the first st (the st with the Ch2 attached), dc in each stitch across and in the top of the Ch2 from the previous row.
-final stitch count should match your final stitch count from row 8.
_________________________________________________________________
For size 8-8.5 only
Rows 9-16: Ch2 (counts as one dc), turn work, skip the first st (the st with the Ch2 attached), dc in each stitch across and in the top of the Ch2 from the previous row.
-final stitch count should match your final stitch count from row 8.
_________________________________________________________________
For size 9-9.5 only
Rows 9-17: Ch2 (counts as one dc), turn work, skip the first st (the st with the Ch2 attached), dc in each stitch across and in the top of the Ch2 from the previous row.
-final stitch count should match your final stitch count from row 8.
_________________________________________________________________
For size 10-10.5 only
Rows 9-18: Ch2 (counts as one dc), turn work, skip the first st (the st with the Ch2 attached), dc in each stitch across and in the top of the Ch2 from the previous row.
-final stitch count should match your final stitch count from row 8.
_________________________________________________________________
For size 11 only
Rows 9-19: Ch2 (counts as one dc), turn work, skip the first st (the st with the Ch2 attached), dc in each stitch across and in the top of the Ch2 from the previous row.
-final stitch count should match your final stitch count from row 8.
_________________________________________________________________
For ALL sizes
Next Row: Ch2 (counts as one dc), skip the stitch the ch 2 is attached to, dc2tog the next two stitches, dc in each stitch across to the last stitch and the ch2, dc2tog the last stitch and the top of the ch2.
-final stitch count should be the stitch count from row 8 minus 2 stitches
Next 2 Rows: Ch2 (counts as one dc), turn work, skip the first stitch, dc in the next stitch and in each stitch across.
-final stitch count should be the stitch count from row 8 minus 2 stitches
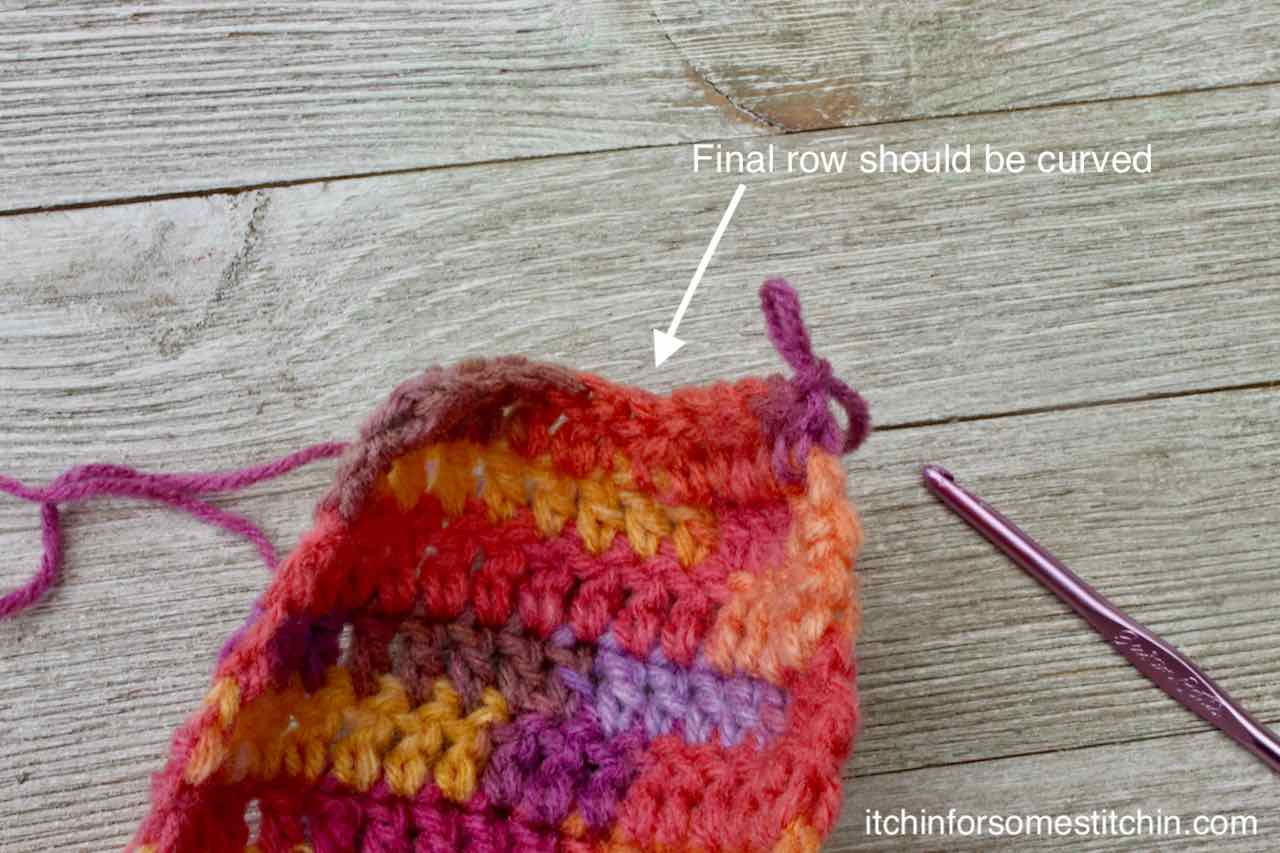
Last Row: Ch2 (counts as one dc), turn work, skip the stitch the ch 2 is attached to, dc2tog the next two stitches, dc in each until you get to the middle of your slipper, dc2tog the middle two stitches, dc in each stitch until you get to the stitch right before the Ch 2 from the previous row, dc2tog the last stitch and the top of the Ch2.
For example: For the size 7-7.5 slippers you should: Ch2 (counts as one dc), turn work, skip the stitch the ch 2 is attached to, dc2tog the next two stitches, dc in each of the next three stitches, dc2tog the next two stitches, dc in each of the next three stitches, dc2tog the last stitch and the top of the Ch2.
-final stitch count should be the stitch count from row 8 minus 6 stitches
- The final row should be slightly curved upwards as it forms the heel.
Finishing:
Fold the back edges of the slipper where you just worked row 18/20 together so that the RIGHT sides are touching and the WRONG sides are facing out.
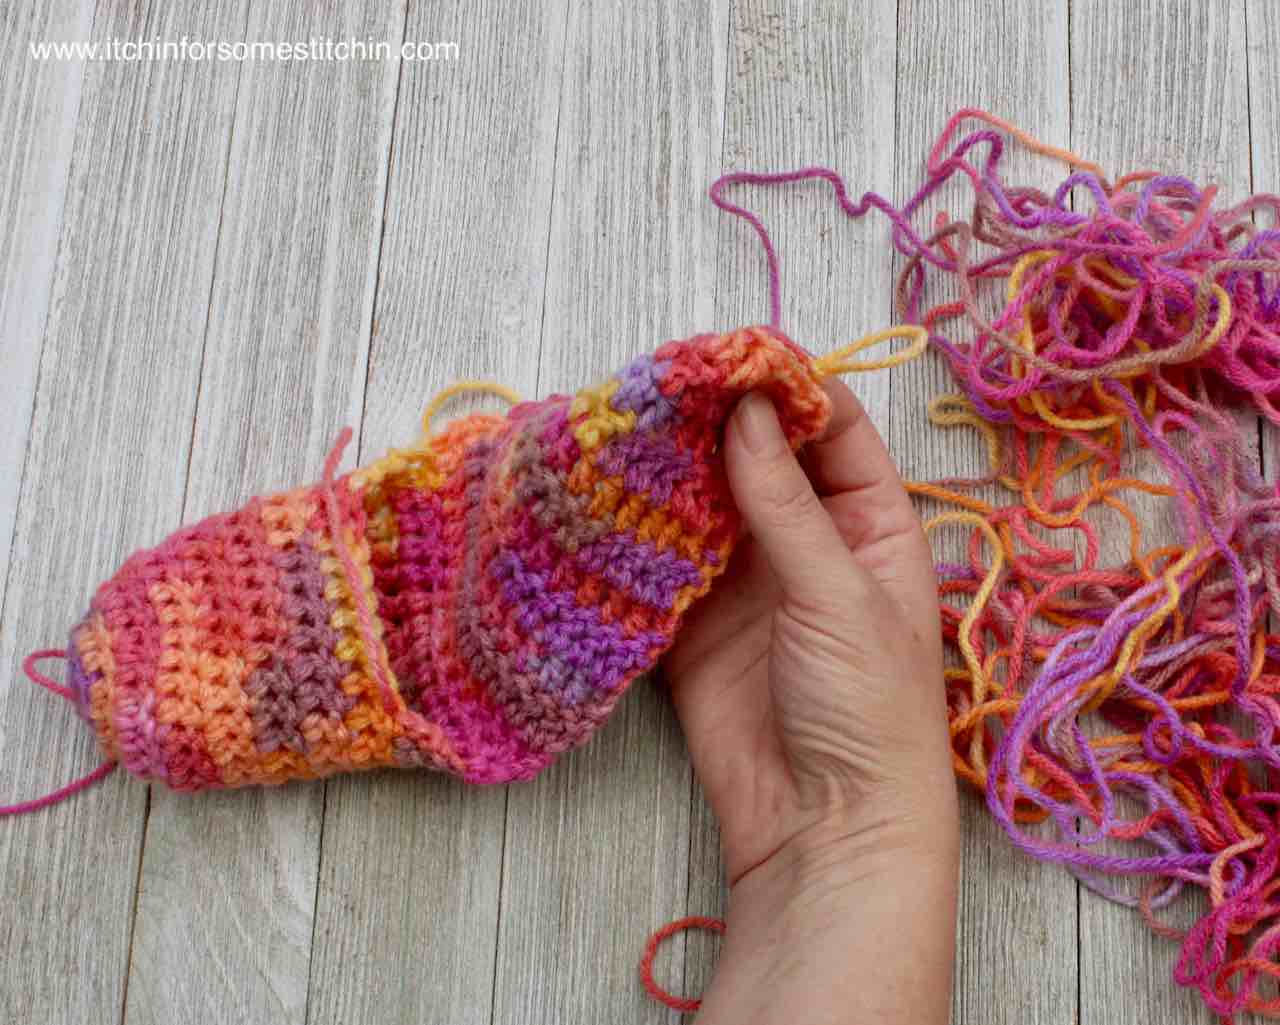
Slp-st together the two edges of the slipper.
Flip the back part of the slipper up and the slp-st seam should be on the INSIDE of the slipper.
Trim:
Attach your preferred yarn using a slip stitch to any stitch, I like to do this at the back of the slipper. Sc in each stitch around.
Bind off & weave in ends
Straps:
Make 2
Row 1: Ch3, leaving a long tail, turn work, sc in the second chain from the hook and in the next chain (2sc)
Rows 2-13: Ch1, turn work, sc across (2sc)
Bind off leaving a long tail.
- Sew strap to slipper diagonally using the long tails.
NOTE: The straps go diagonally from the toe area on the outside of the foot and extends towards the heel on the inside of the foot. The flower (or other embellishments) on the left slipper is sewn on the left at the top of the strap near the toe. The embellishment for the right slipper is sewn on the right at the top of the strap near the toe.
Embellishments:
You can embellish these slippers however you please! Simply add a flower, button, bow, or whatever you choose onto the slipper at the end of the strap.
5 Petal Flower Embellishment
Make a magic ring.
Round 1: Once you have your ring, *ch3, 2 dc into the ring, ch3, slp-st into the ring*. Repeat from * to * 4 times. (5 petals formed)
- Pull it tight to reduce or completely get rid of the center hole.
- Bind off & weave in ends.
For a video tutorial please see How to Do the Magic Ring Plus a Simple 5 Petal Flower
I have to tell you that my pattern testers loved this slipper design!
However, in full disclosure, many of them struggled with the original way the pattern had been written.
The pattern posted here is the result of all their time, hard work, and suggestions.
Yet, keep in mind that all feet are different. And each person has their own preference.
Throughout the testing process, we found that individuals with the same shoe size would prefer that the slipper fit differently.
For example, one would prefer a looser fit while the other would prefer a tighter fit.
This is because even though they shared the same shoe size, their feet were still quite different!
Because of these subtleties, you may need to make slight adjustments to your slippers to make them fit your personal preference.
I have noted areas in the pattern where these adjustments can best be made.
I aim to create easy “crochet for beginners” patterns, so if you are struggling, please contact me via the contact page and I will do my best to help you!
Thank you for coming to my blog! By sharing my content and/or making a purchase you are making it possible for me to continue producing and sharing free content for everyone to enjoy. I sincerely appreciate your support!
Until next time… Happy Crocheting!


Looking for fun crochet community filled with lots of crafty inspiration? Join my Facebook group!
casey miller
Friday 7th of May 2021
i wpuld like th pattetn fot the slippers that pink, pink, and orange for free please tommrow.
Itchin4Stitchin
Sunday 9th of May 2021
Hi Casey,
I'm so sorry, but I must be misunderstanding your question. This pattern is always available for free on this website. The pink and orange version is this pattern, just using pink and orange yarn. Please contact me at [email protected] if you need further assistance.
Best wishes,
RaeLynn
How to Crochet a Foundation Chain - Itchin' for some Stitchin'
Tuesday 25th of June 2019
[…] Beginner Infinity Scarf /2. How to Crochet the Bead Stitch /3. Easy Beginner Slippers […]
Fran
Wednesday 5th of June 2019
The final row of this slipper doesn't work out for me. I started row 8 with 16 stitches. Then it gets reduced by 2 leaving 14. If I follow the final row the way it's printed, after the 3 dc I have 4 stitches left. The last two get done together but what about the 2 between. And if I just dc them since there are 3 dc2tog, I only have 11 stitches and you say it should be the starting number (16) minus 4 which gives me 12. How do I adjust this row? Thanks.
Itchin4Stitchin
Wednesday 5th of June 2019
Hi Fran,
Thank you so much for bringing this to my attention! You are correct there is an error - so surprising after 6 pattern testers! Lol. But, mistakes do happen and I will fix it right away. The last row for your size should be:
Last Row: Ch2 (counts as one dc), turn work, skip the stitch the ch 2 is attached to, dc2tog the next two stitches, dc in each of the next three stitches, dc2tog the next two stitches, dc in each of the next three stitches, dc2tog the last stitch and the top of the Ch2.
-final stitch count should be the stitch count from row 8 minus 6 stitches
Try that and let me know if that fixes the issues. You can always also email me at [email protected] for more direct communication.
Sincerely,
RaeLynn