Hi there folks!
I am so excited to share this tutorial with you today! That’s because I know that as a beginning sewist, one of the things you crave most, is super simple projects. Easy projects boost both confidence and skill level so you are prepared to take on those more challenging projects in the future.
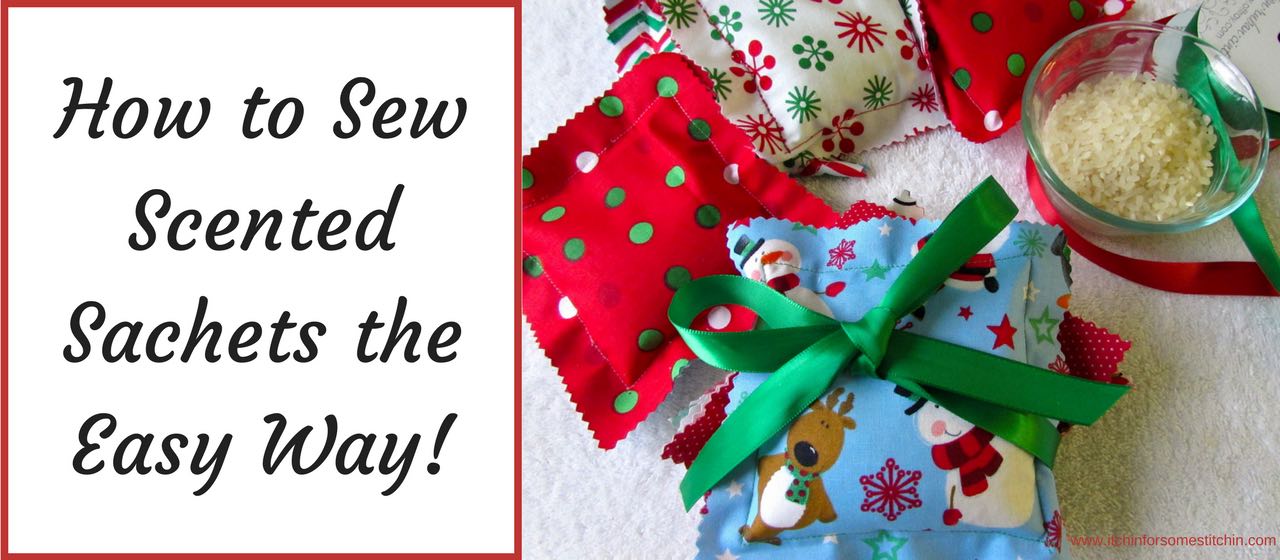
Scented sachets are a great project for any sewing beginner to cut their teeth on, not just because they are so easy, but also because they are very quick. Each sachet can, in fact, be sewn in about 10 minutes! Plus, they make great gifts.
Fast, easy, and useful, what more could you ask for in a sewing project? Let’s get started!
* This post may contain affiliate links. Your support is appreciated! See my full Disclosure Policy for details.
What Are Scented Sachets?
Okay, so before you learn how to make scented sachets, it might be beneficial to know what they are.
Scented sachets are small cloth bags or packets filled with herbs, potpourri, or other delightfully scented materials.
They can be made in a variety of shapes and sizes. Most tend to be on the smaller side around 4-5 inches, but it’s really your personal preference. Sachets can be squares, balls, rectangles, or any other shape you can think of. I have even heard about triangular sachets that are then tweaked into angels using ribbon.
Scented Sachet Uses
Scented sachets are typically used to add fragrance to closets, drawers, automobiles, stuffed animals, dryers, etc…
They are also often used to help people sleep. These “dream pillows” are usually filled with sleep-inducing ingredients such as lavender, chamomile, and valerian to help promote a good night’s rest.
“Spiced sachets” are usually filled with sweet-smelling spices like cinnamon, cloves, allspice, nutmeg, aniseed, and vanilla beans. If you make a spiced sachet into a pot holder and place a hot dish on top, it releases an amazing aroma!
A sachet filled with lavender, hyssop, rosemary, cedar, sassafras, or winter savory can be a pest deterrent as they keep away destructive insects and worms. “Moth bags” filled with sage, lavender, and lemon verbena rosemary are extremely popular.
How to Sew Scented Sachets
Now that you know what scented sachets are, it’s time to learn how to make these handy fragrant little bags.
There are literally tons of different ways to sew scented sachets, but in this tutorial, I am going to show you the easiest way I know. It involves only the basic sewing tools and skills, so it’s perfect for even an absolute sewing beginner. It would make a great first sewing project!
Tools Needed
- sewing machine
- fabric scissors (I personally recommend Fiskar’s Easy Action Scissors, they are the best!)
- pinking shears
- 100% cotton or muslin fabric
- coordinating thread
- ruler or measuring tape
- rotary cutter and mat (optional)
- straight pins (optional)
- tailor’s chalk or pen (optional)
- funnel (optional)
I decided to use holiday themed fabric since I did this project around Christmas time. I gave some of my sachets aways as presents and put one in each of my children’s stockings. However, you can use any fabric you wish and use them for any purpose you choose.
Fillers
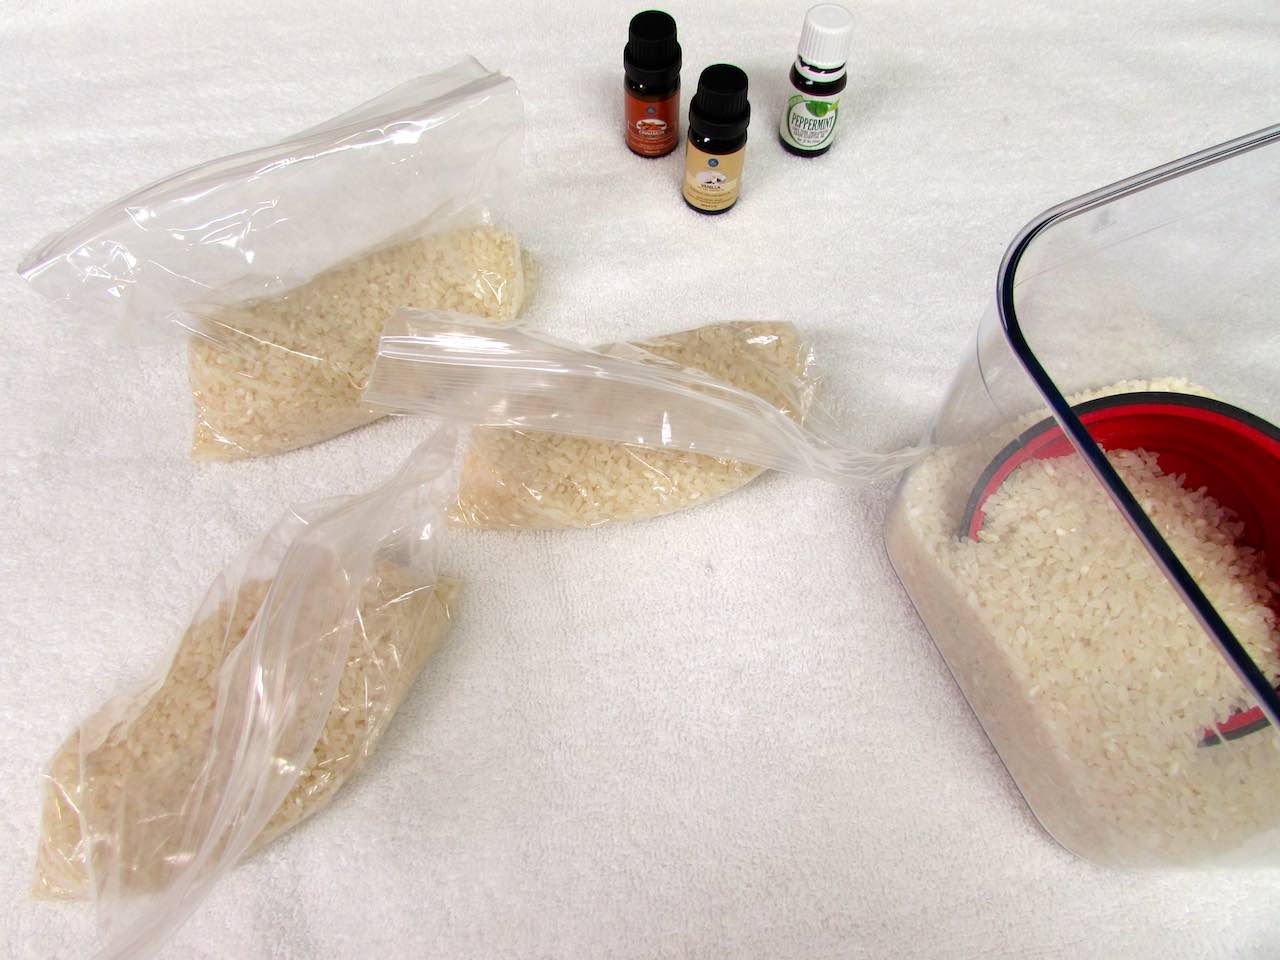
As I mentioned in the What Are Scented Sachets? section, sachets can be filled with a variety of perfumed materials. For this tutorial, I chose to use scented rice.
To make scented rice you need:
- essential oils: Cinnamon, Peppermint, and Vanilla
- rice
Since I was making my sachets as gifts for Christmas, I decided to use traditional holiday scents. I made sure that the one I put in each of my children’s stockings was their favorite seasonal smell! You can, of course, use essential oils of any scent you like.
How to Make Scented Rice
Each sachet requires about 1 cup of rice. The number of essential oil drops you add to the rice is entirely up to you. However, I would suggest you add the drops slowly.
Remember, you can always add more scent, but you cannot remove it!
This is how I made my scented rice:
- Fill a plastic sandwich bag with rice
- Add one essential oil fragrance until satisfied with the smell
- Massage each sandwich bag to distribute the oil throughout the rice
- Let the bags sit for 2-4 days to let the oils soak into the rice
Sachet Tutorial
Step One
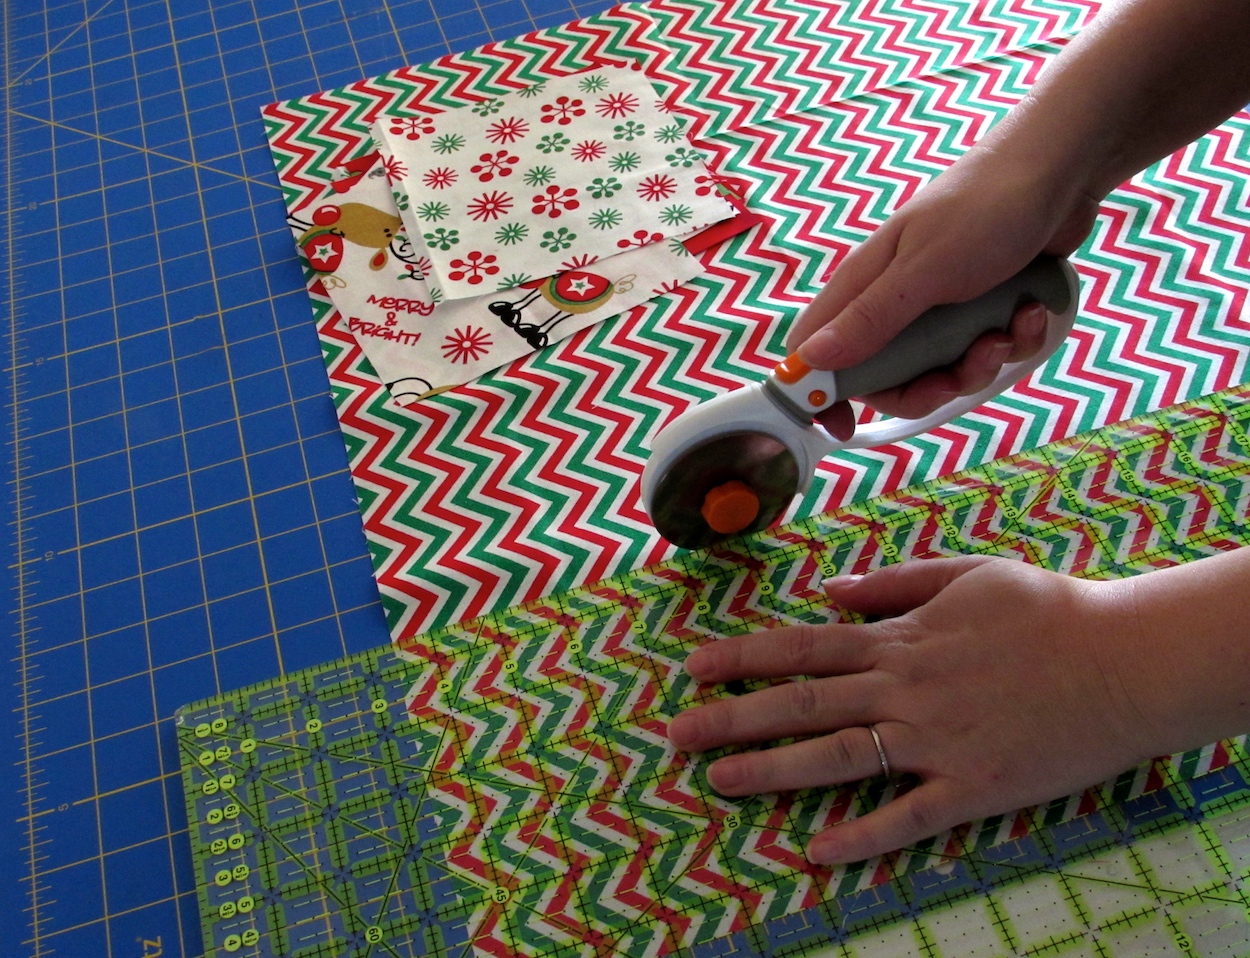
Cut your fabric into 6-inch by 6-inch squares. I used a rotary cutter and mat, but you could also use regular fabric scissors if you have a steady hand and can easily cut a straight line.
I am not ashamed to admit that I cannot. Thus, my rotary cutter and mat are some of my sewing best friends! I do highly recommend adding them to your sewing tool chest if you don’t already have them.
Step Two
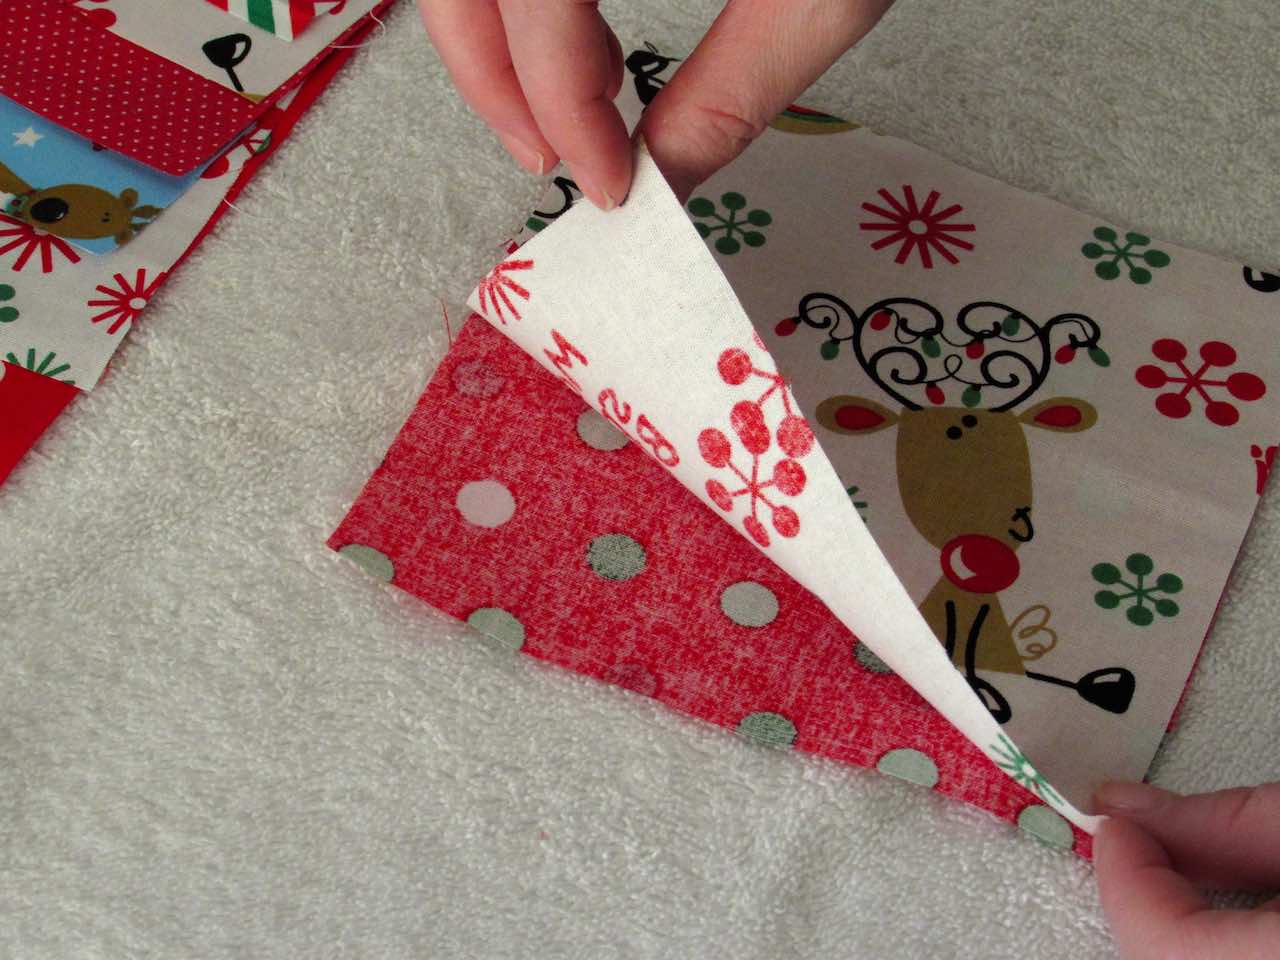
Each sachet requires two squares of fabric. Place the two squares together, with WRONG sides facing and even up the edges.
Don’t stress if the edges are not perfectly square. Some sewing projects have to be exact. This is not one of them. Another reason that it’s great for beginners!
Step Three
Sew around the squares about 1-inch from the edges. If you cannot eyeball this as you sew, which I found that I cannot, it’s best to mark the 1-inch before you sew.
There are multiple ways to do this. If you have tailor’s chalk or pen, you could measure the 1-inch and then mark the fabric. I, however, used straight pins. I measured 1-inch in from all edges and placed a straight pin on each corner. Then I sewed from corner to corner in a straight line, removing the pins as I went.
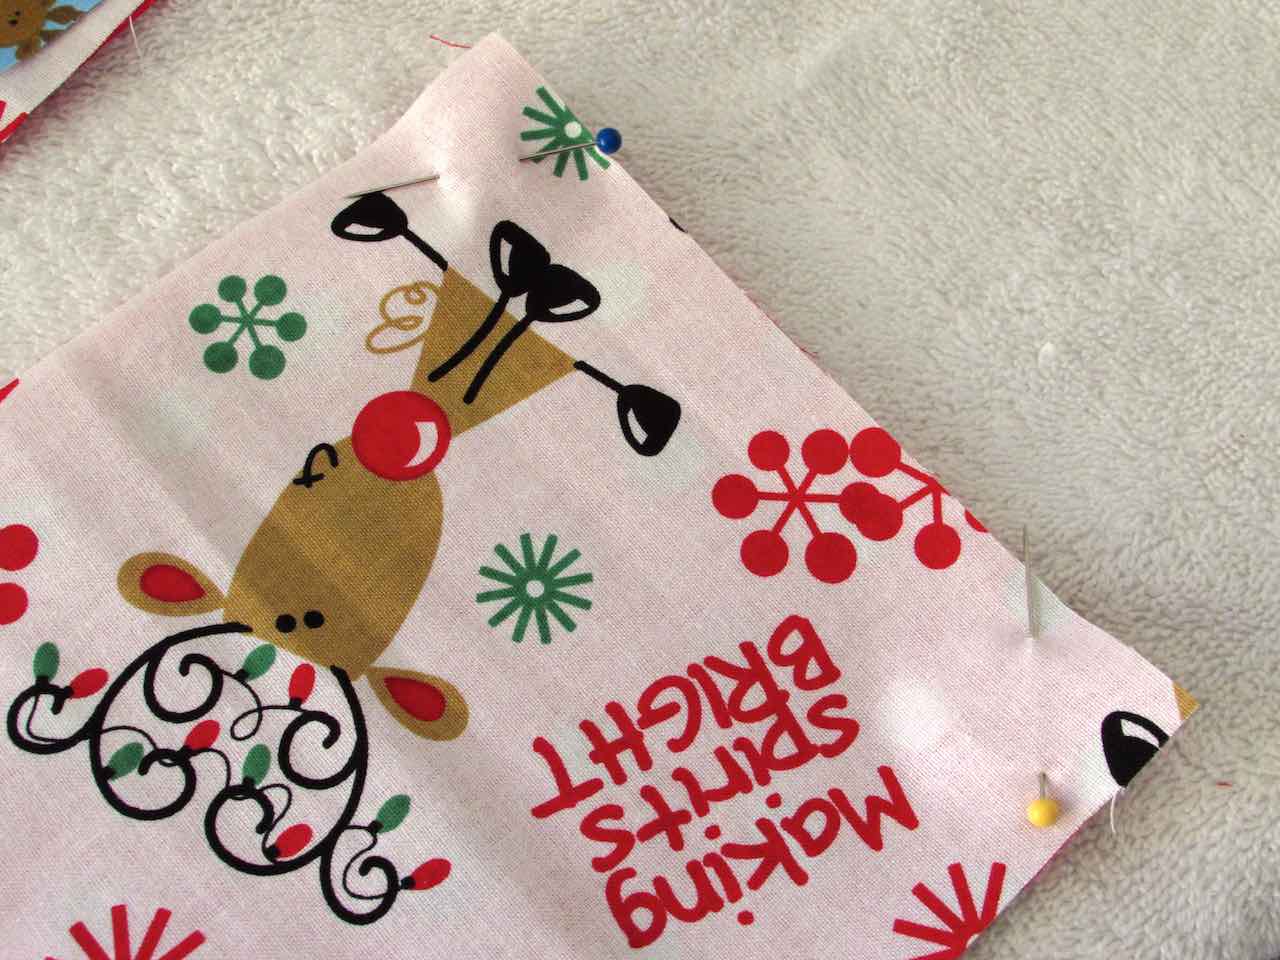
Do NOT sew all the way around the squares! Be sure to leave a 1-inch opening. This hole is where you will add the scented rice filler to the sachet.
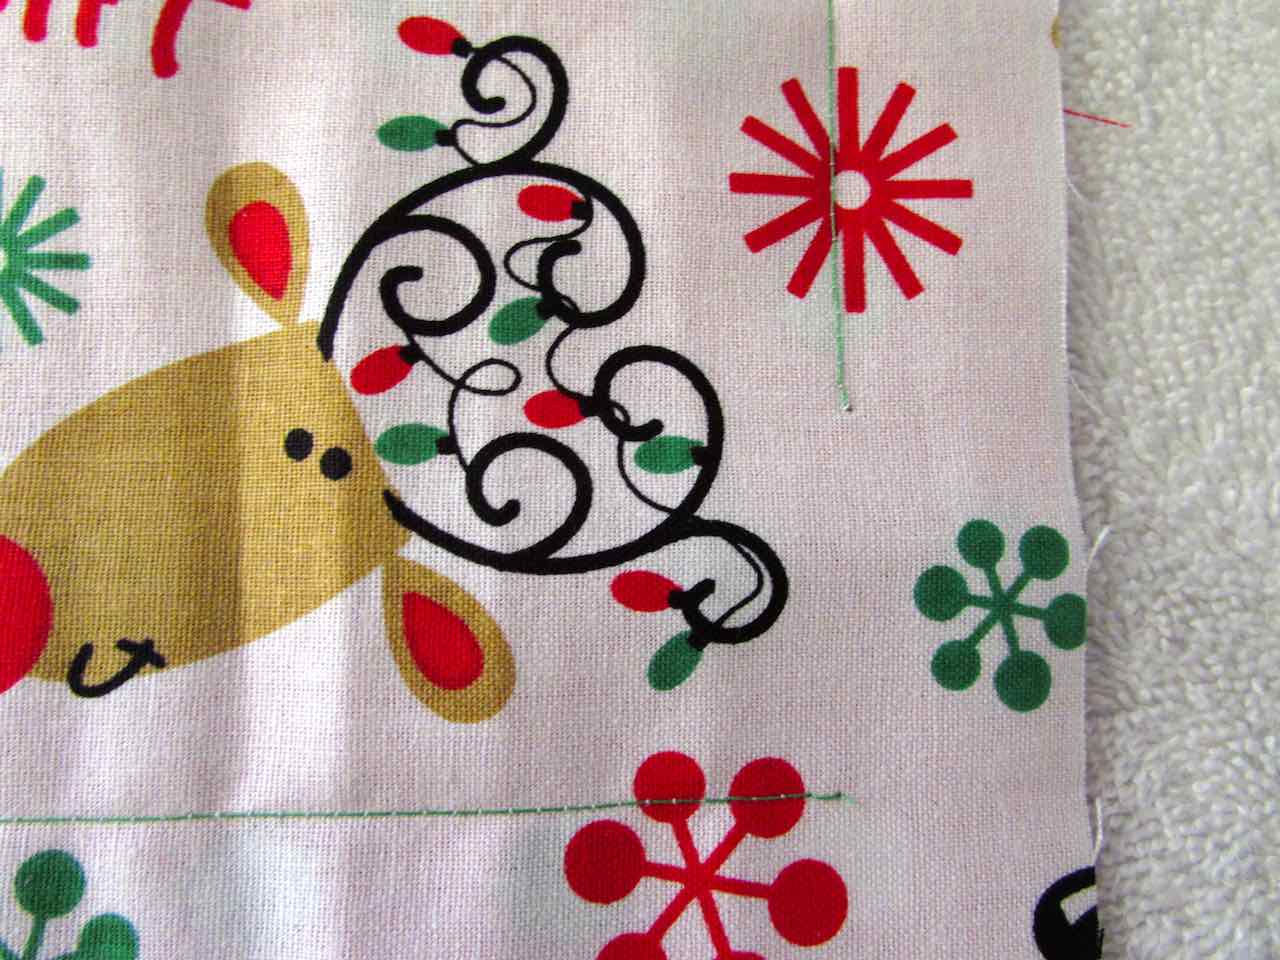
The simplest stitch to use for this project is the straight stitch and it is the one I would recommend for absolute sewing beginners.
However, if you are a little more experienced or are confident in your skills, you could also try some decorative stitching like the zigzag stitch or serpentine stitch.
Zigzag Stitch
Serpentine Stitch
Step Four
Add the scented rice to the sachets. You can use a funnel or simply roll up some paper or cardboard. Place the funnel into the 1-inch opening you left unsewn and pour the rice into the funnel until it fills the bag to about 3/4 full.
Step Five
Sew the 1-inch opening closed. Be very careful when you do this. Make sure that none of the rice is in the way of your needle when you are sewing!
Step Six
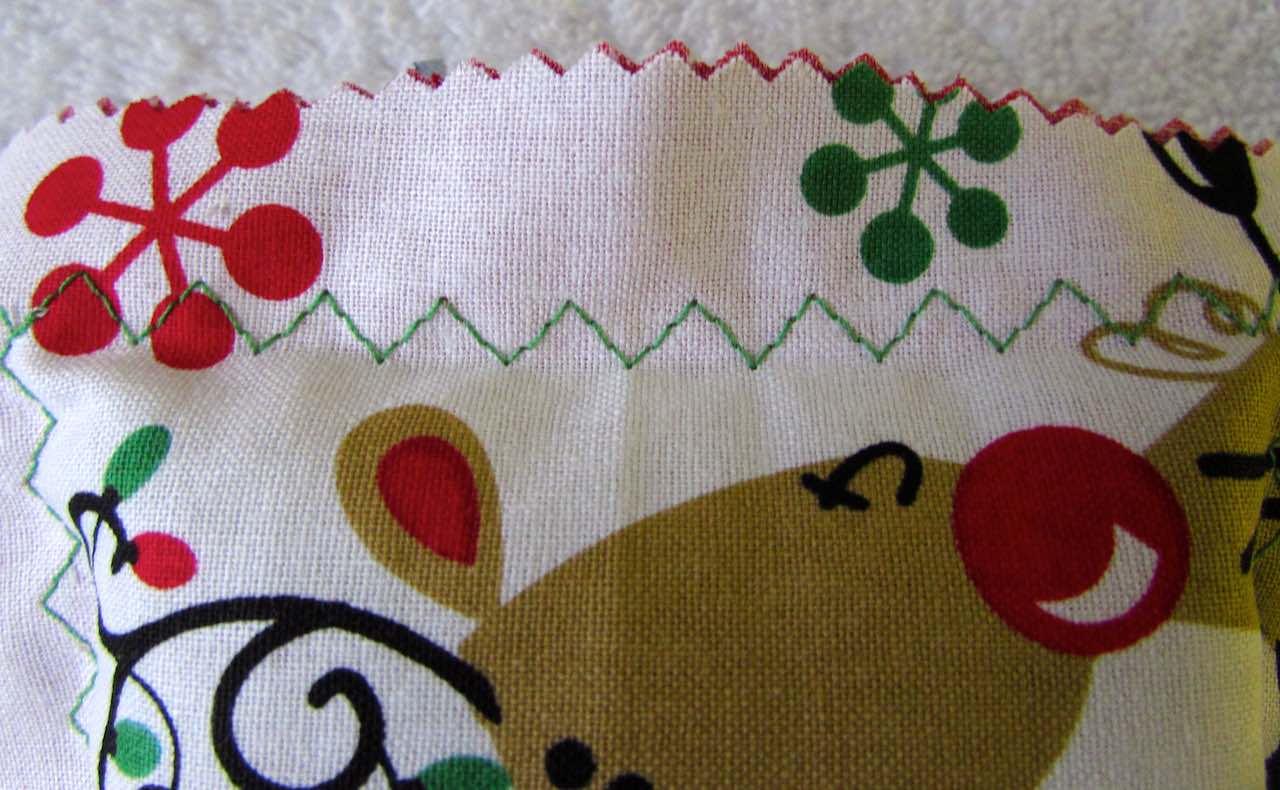
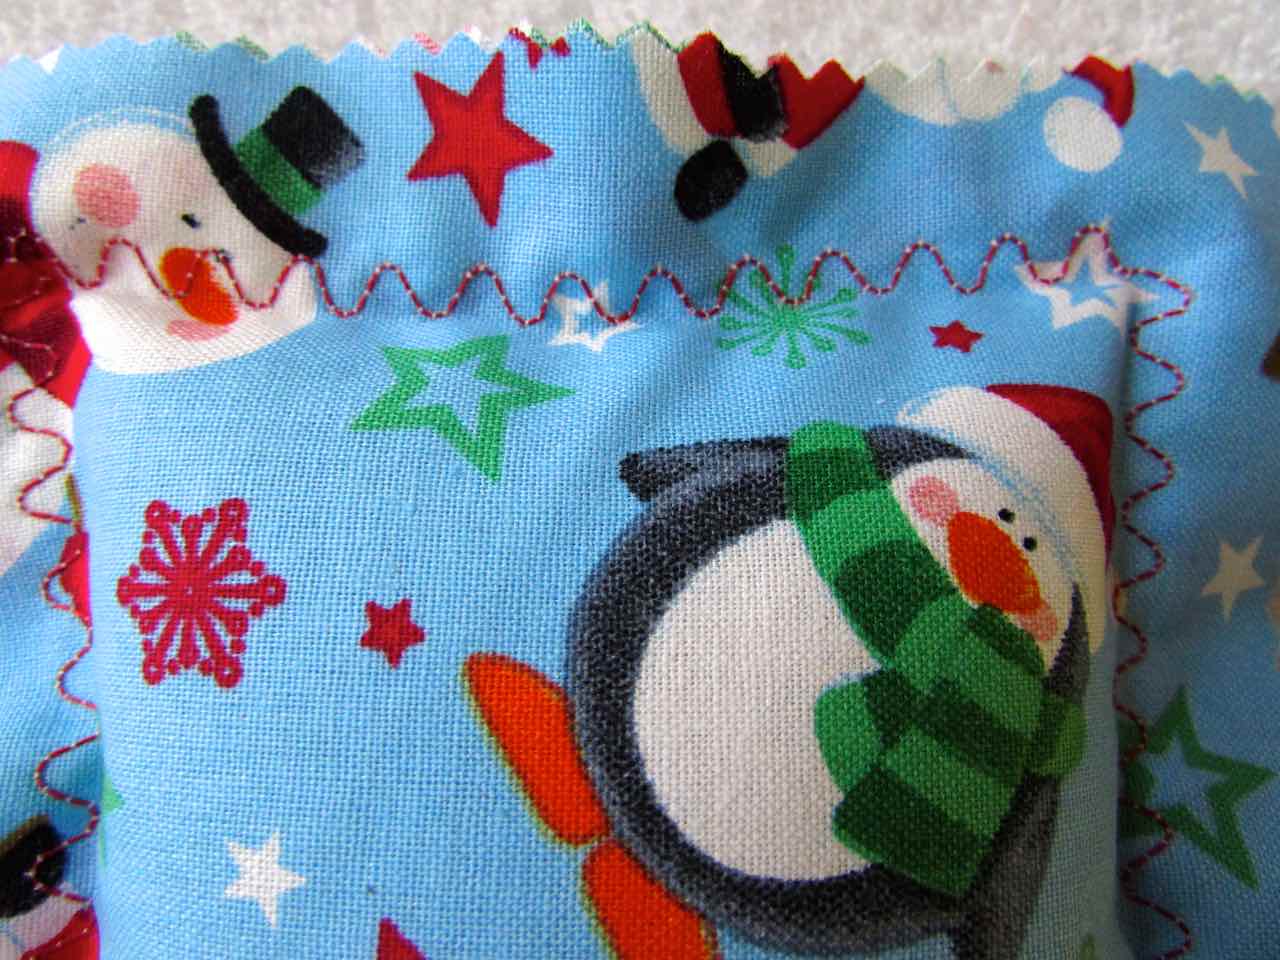
Use pinking shears to trim about 1/2-inch from the edges of each sachet. Pinking shears are typically used to stop the fabric from fraying, but in this case, they add a nice decorative edge to each bag.
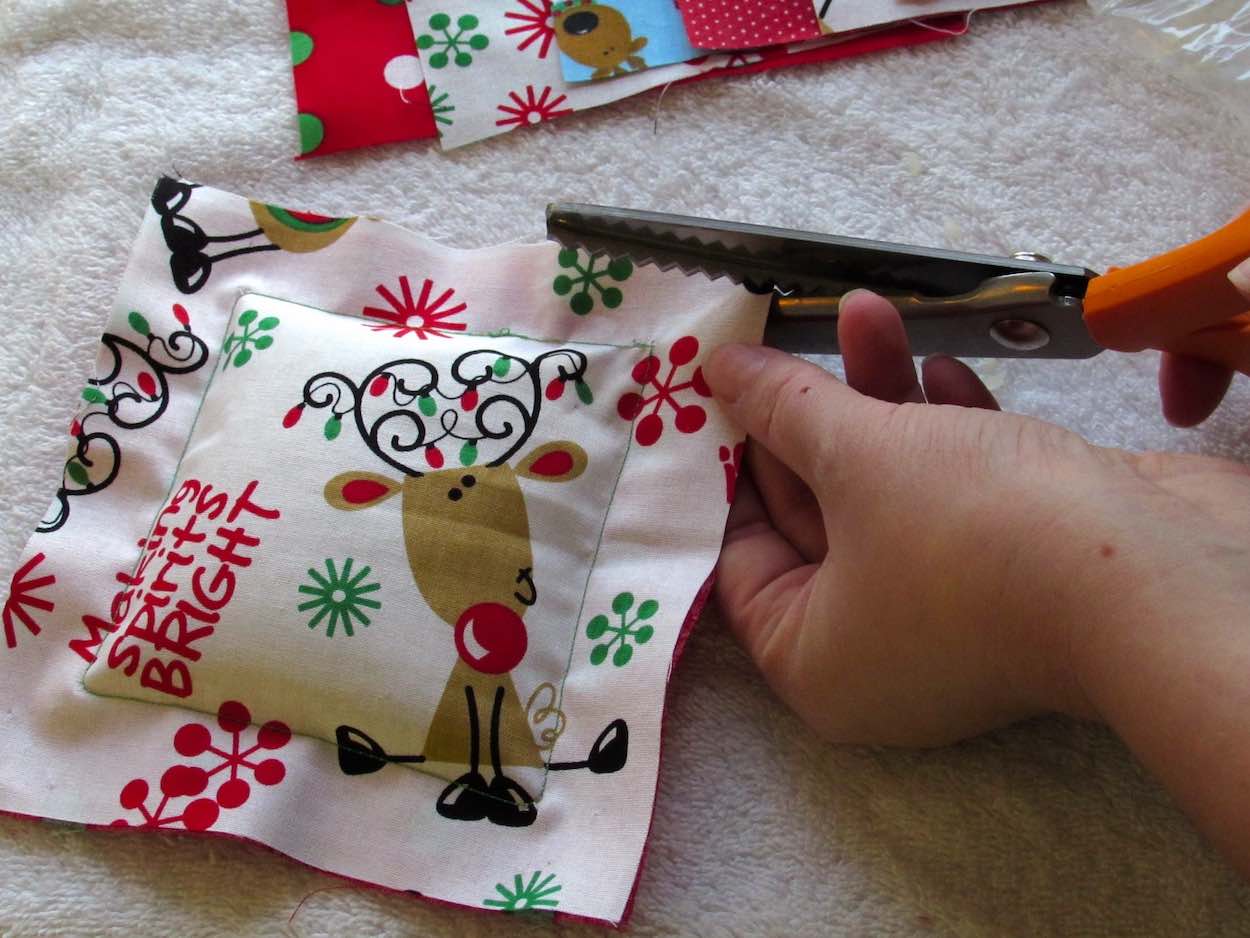
Step Seven
Trim any excess thread or fabric. This just makes the project nice and tidy. 🙂
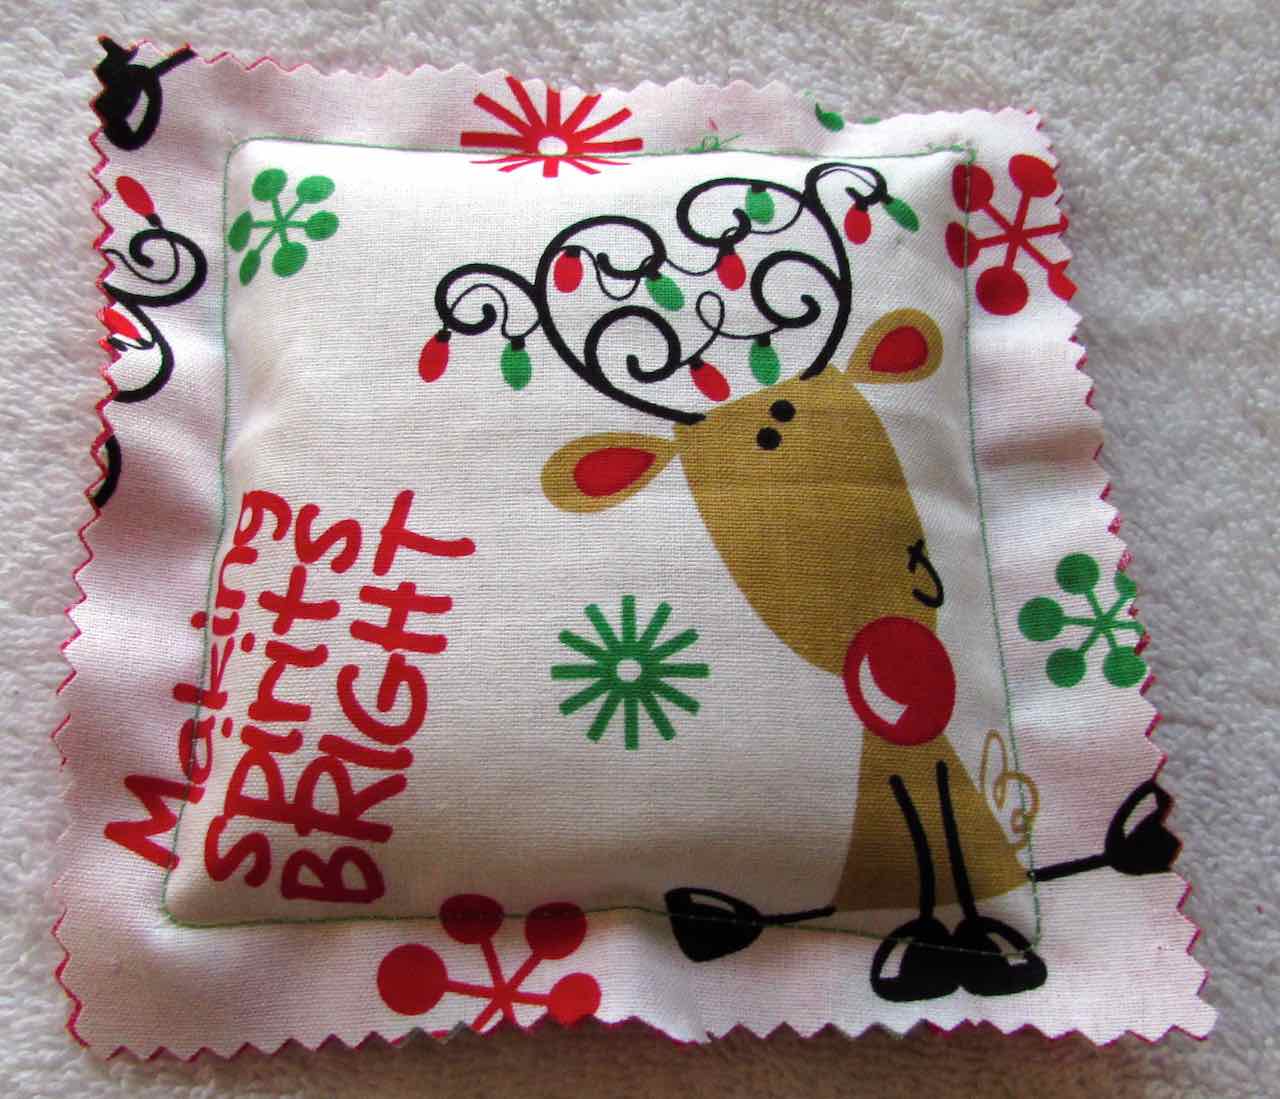
One side of finished sachet
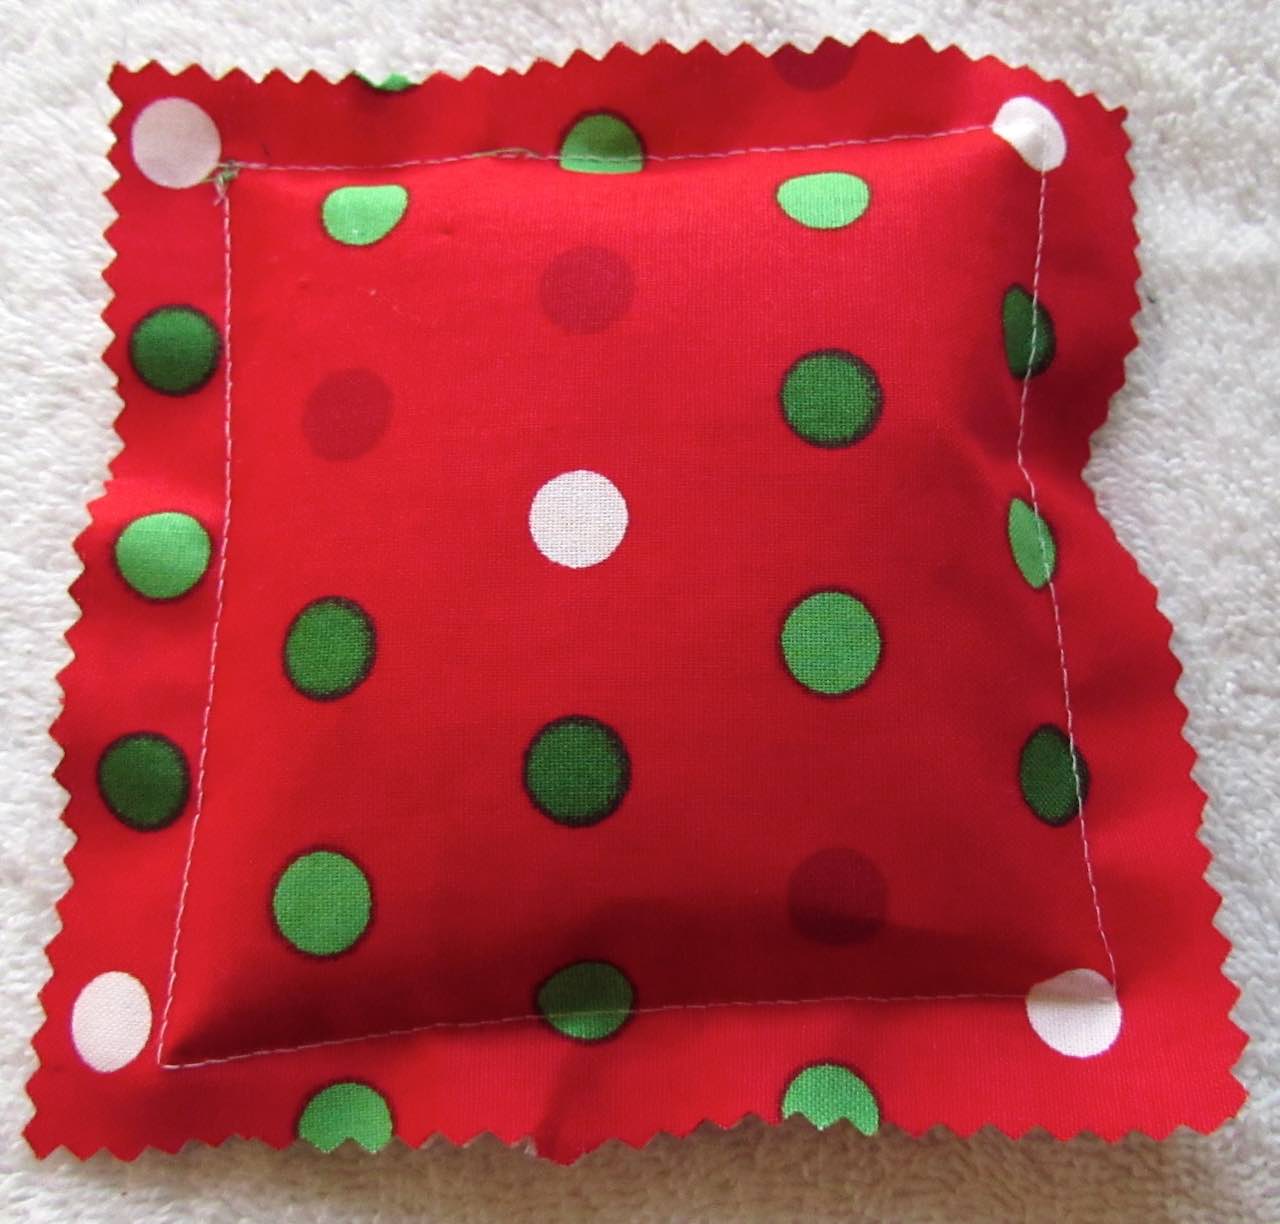
Second side of finished sachet
That’s it! Easy peasy, right?
Although I chose not to do this, as I thought my sachets were awesome as is, you can also add some embellishments to your sachets for a little flair. You could add buttons, ribbons, bells, or jewelry pieces to give your sachets that little something extra!
Did you enjoy this tutorial?
Please Share!
Until next time… Happy Sewing!


Jessica
Wednesday 12th of December 2018
My 10 year old daughter got a sewing machine for her birthday this year, and is making all of her teachers sachets for Christmas using this tutorial. Thank you for posting it!!
Itchin4Stitchin
Wednesday 12th of December 2018
Hi Jessica,
You and your daughter are so very welcome! I know your daughter's teachers will love them. :)
Sincerely,
RaeLynn