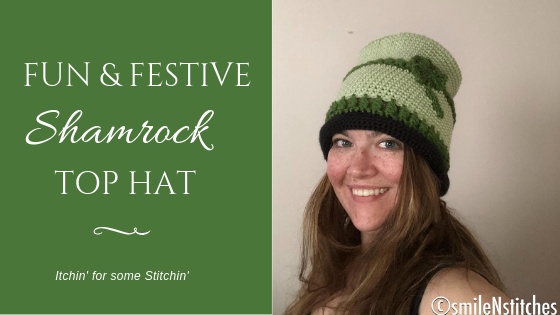
Hi ya folks! Today’s crochet pattern is all about fun!
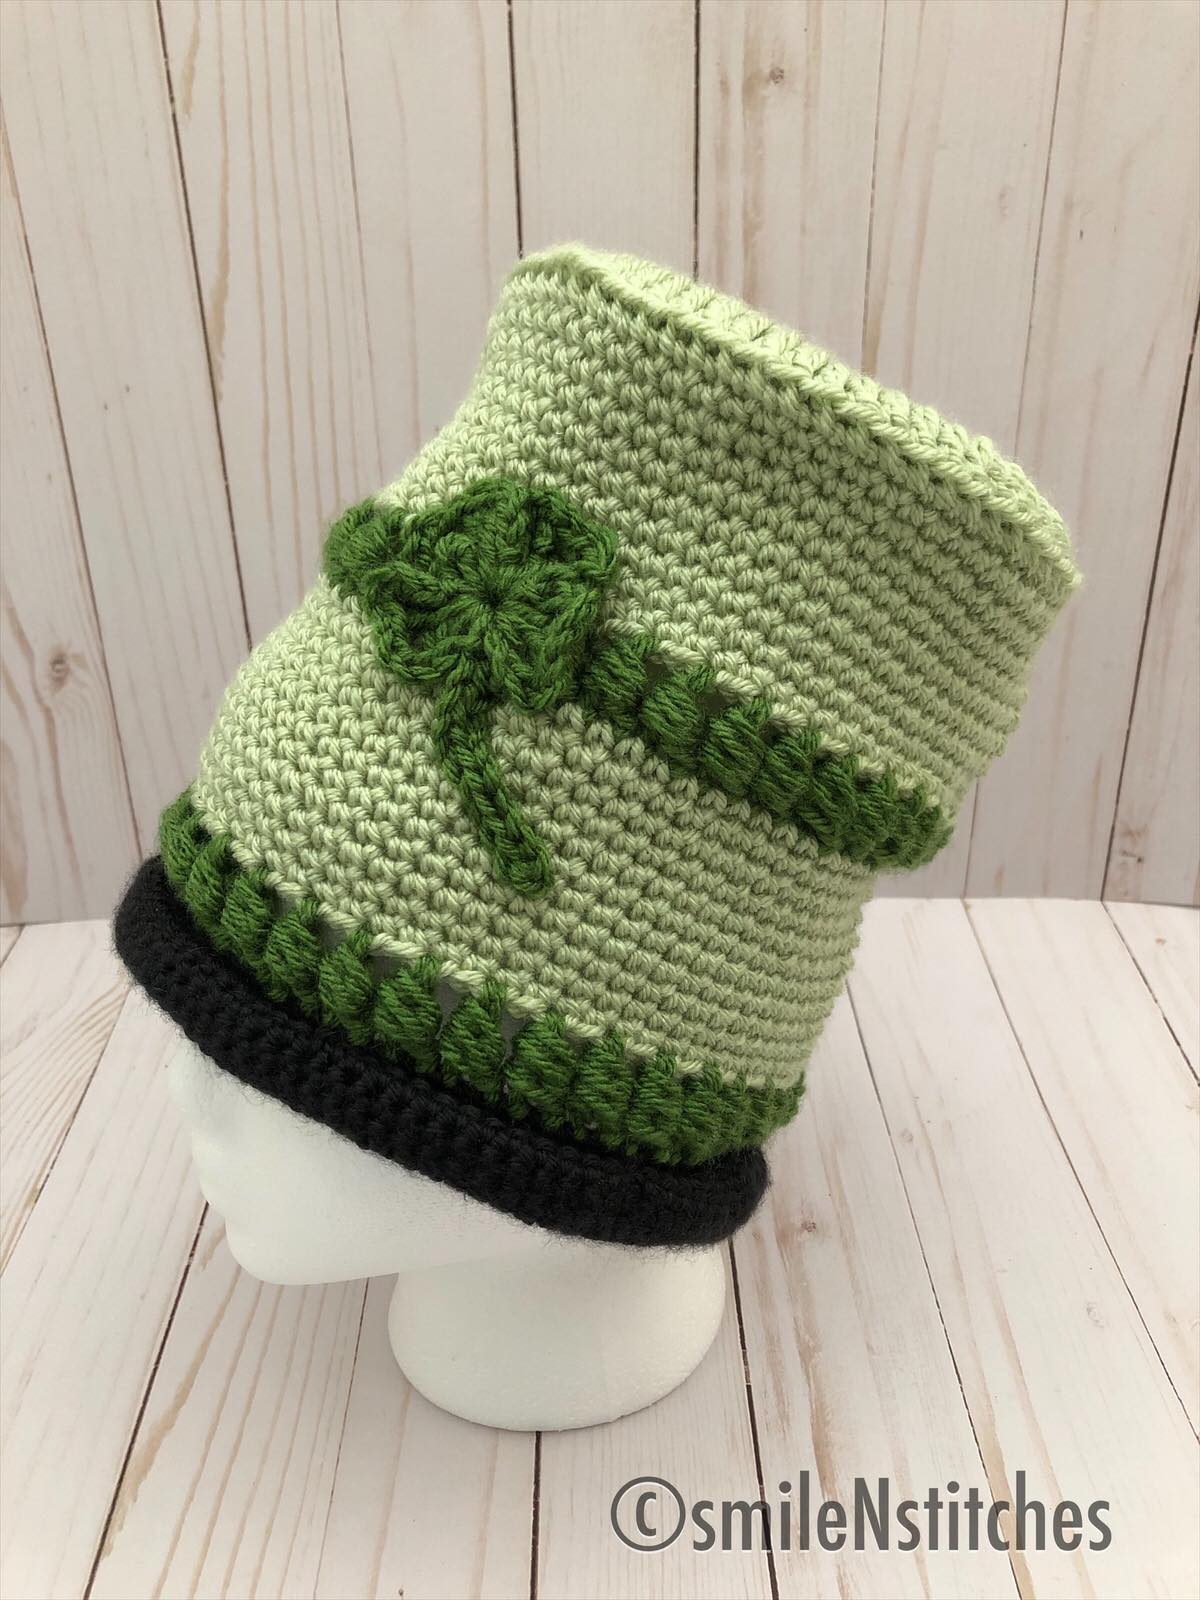
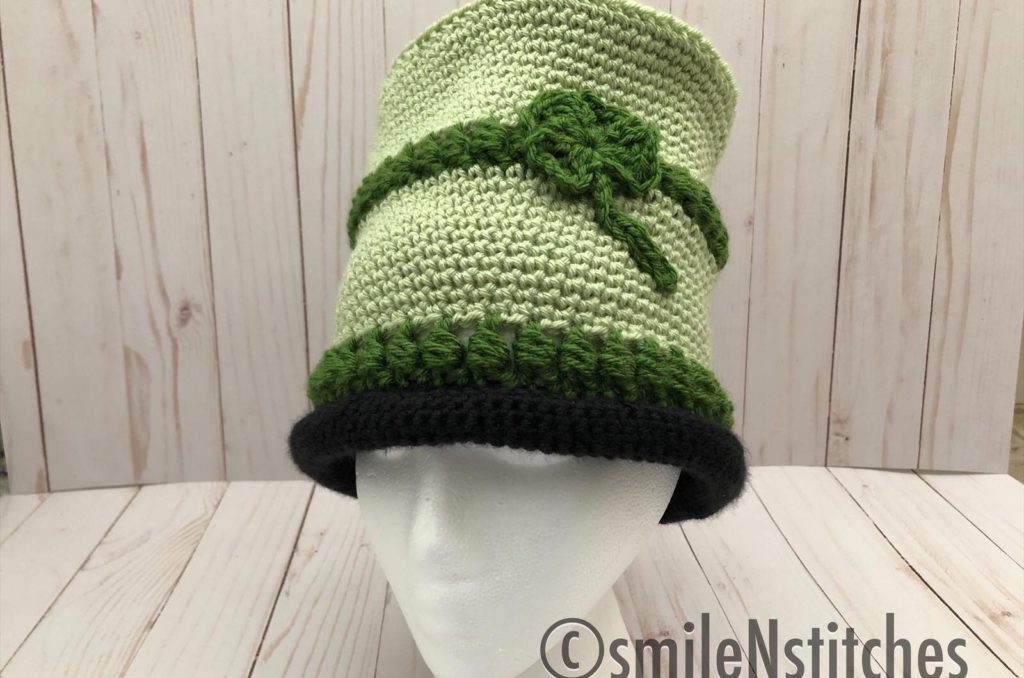
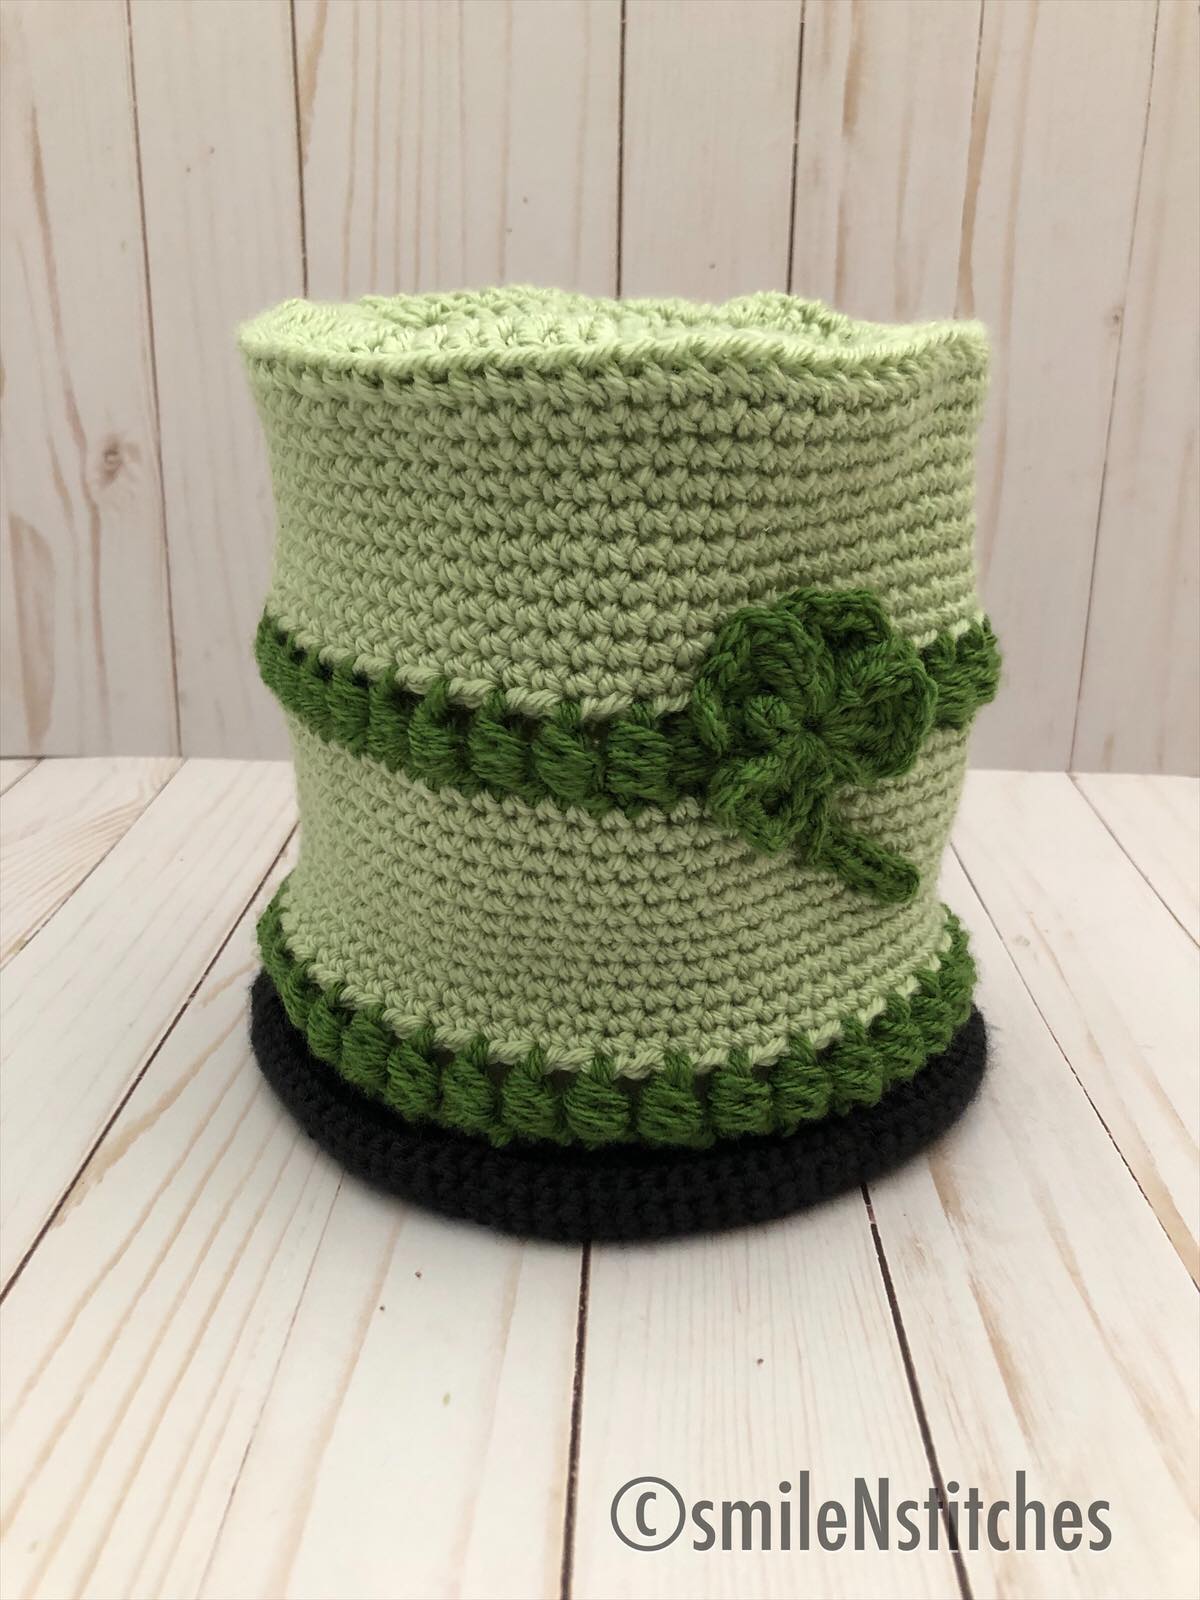
It’s a charming and festive St. Patrick’s Day top hat decked out in two shades of green and adorned with a shamrock for that Luck O’ the Irish flare.
You see, St. Paddy’s Day is actually a pretty big holiday at my house because my husband has a strong Irish heritage on both sides of his family.
I don’t usually go full out with green home decor, but I do always get a little festive with the meal and at least one creative project.
This year I actually did two creative projects!
I did this super fun top hat and a festively chic bowler hat as well.
Want the St. Patrick’s Day Bowler Hat Pattern? Get it HERE.
Believe it or not, this top hat is super easy!
That’s right!
It uses a combination of beginner stitches (dc and sc), plus the super cool looking bead stitch – which may or may not be new to you, either way, it’s easy to do.
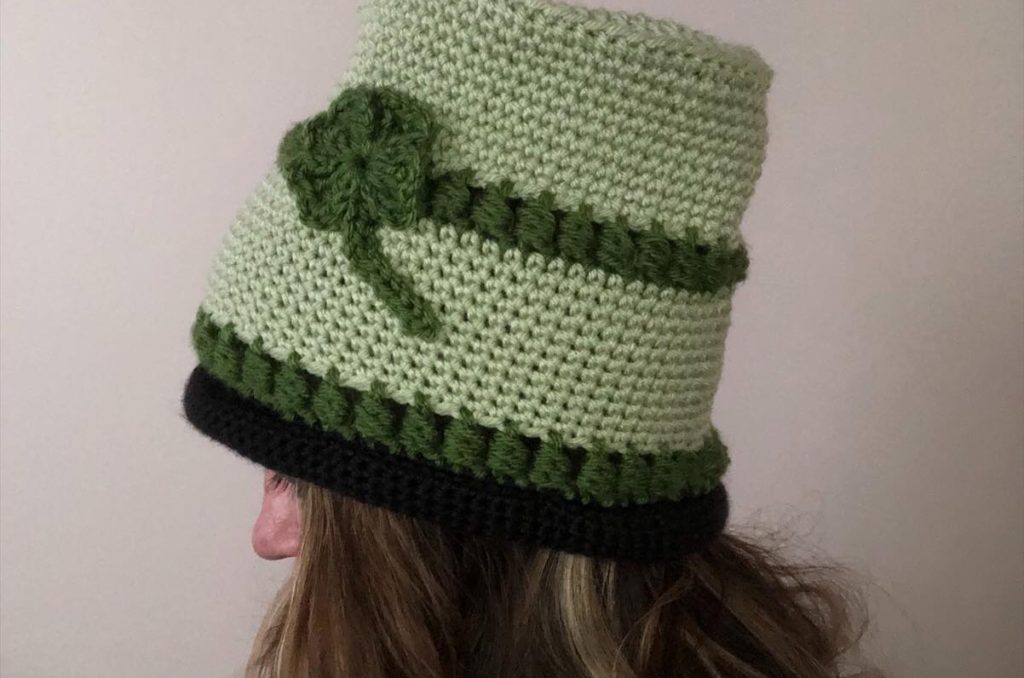
Note: The crochet shamrock top hat pictured above was crocheted by one of my wonderful pattern testers, Nikki Barker of smileNstitches.
Would you like to be a pattern tester? Apply HERE!
Now, this simple crochet top hat is crocheted in the round. So, if you need a little help with that, please check out: How to Crochet in the Round for a full tutorial.
But honestly, it’s really not that hard once you get crocheting in the round down.
Check Out These Other Patterns I LOVE!
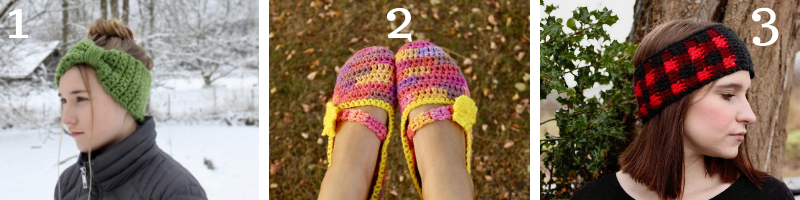
- Simple & Sweet Bowtie Head Warmer / 2. Easy Beginner Crochet Slippers / 3. Simply Chic Plaid Ear Warmer
My Patterns on Allfreecrochet.com
Crochet Seed Stitch Baby Blanket
Ribbed Baby Beanie Pattern for Beginners
The Boho Goddess Kimono Cardigan
My Other Videos
How to Crochet an Easy Top Hat for St. Patrick’s Day
**THIS IS AN ORIGINAL PATTERN. Please see my Copyright Statement for details.
I am so happy with how this pattern turned out!
For the longest time, I thought that top hats were out of my realm. Honestly, I wasn’t sure how to keep them standing up. I was sure anything I tried would just flop over.
Then I designed this bad boy and, you know what?
It was so much easier than I ever thought. 🙂
Prefer a PDF?
[list style=”style6″]
[li]This pattern is available as a large print, ad-free, printable PDF pattern. Get it HERE.[/li]
Love Pinterest? I do!
[li]PIN this pattern to your Pinterest boards for later HERE. You can also follow all my boards![/li]
Pattern
[li]Add this pattern to your Ravelry que HERE.[/li]
[/list]
Summary:
St. Patrick’s Day is all about the fun and festive, which makes this cheerful top hat the perfect accessory for all your Luck O’ the Irish merriment! Crocheted using the simplest of stitches combined with the beautifully textured bead stitch, this hat truly is fun to create and wear. Get ready to get your green on!
Difficulty level: Level 1 or 2 – Advanced Beginner/Intermediate
Finished Dimensions:
The hat can be easily made to any of the following dimensions according to your needs. See pattern for details.

Gauge: 15 stitches and 20 rows = 4-inches in single crochet.
NOTE: Gauge here is measured using a flat piece of crochet. Because construction of flat crochet and in the round patterns is very different, in rounds the gauge would be 17 stitches and 18 rounds in single crochet.
Materials:
- Medium 4 worsted weight yarn – 2 colors, A & B for body. Color C for brim (optional) – can also use color A for the brim.
~ In this pattern I used Patons Canadiana-light green-for color A , Vanna’s choice-dark green-for color B and caron simply soft-brown-for Color C.
~ Total yardage: 100 to 250 yards
- Crochet Hook size I/9-5.5mm (or whatever hook to meet gauge)
- Crochet Hook size F/5-3.75mm (or whatever hook to meet gauge)
- Tapestry needle
- Coordinating thread (optional)
- scissors
(Click HERE to find my favorite crochet tools & resources)
Abbreviations:
Pattern is written in US terms.
Stitch/es (st/sts)
Blo – back loop only
*__* – Repeat indicated instructions
Special Stitches:
Bead stitch (bst) – *yarn over, insert the hook behind the previous double crochet from front to back, yarn over and pull up a loop* Repeat from * to * 2 more times (3 times total = 7 loops on the hook). Yarn over and pull through 6 loops, yarn over and pull through remaining loops on the hook.
Additional Notes:
- In this pattern, diameter is more important than gauge. Make sure that your diameter is accurate. This will give you the number of stitches you need around your hat. If your gauge is way off, you may need to adjust the number of rows to to meet the length specified in the chart.
- When your crown reaches the proper diameter for the hat size you are making, be sure that your number of stitches is an even number. This may mean reducing or increasing by a few stitches depending on your increase method.
- Do not use the length indicated in the chart. The chart is for size standards, but a top hat is not standard. Follow the pattern instructions below for all hat sizes to get the proper length.
- The brim will add another 1.5-inches when it is unrolled and about 0.75-inches when rolled.
Instructions:
Crown
Use hook size I/9-5.5mm.
With color A, crochet 12 dc into a magic ring (Click here for tutorial). Then increase, using dc, until the crown of your hat reaches the specified dimensions in the provided chart for the hat size you are creating.
FOR EXAMPLE: For the teen/adult small you would make the crown of your hat 6.75 -inches across (diameter), this is a total of 72 stitches (using the increase method below).
Everyone tends to increase a little differently. Below is the method that I prefer.
Increase

This is what round 1 should look like after making 12 dc sts into a magic ring (alternatively, you could ch 4 and slp-st into the first ch to form a ring and then make 12 dc into that ring).
Round 2: ch 3, work 2 dc sts into each st around, slp-st to close. (24 sts)

Round 3: ch 3, dc in the first st, 2 dc into the next st, *1 dc in the next st, 2 dc in the next st* Repeat from * to * around. Slp-st to close. (36sts)

Round 4: ch 3, dc in the first st, dc in the next st, 2 dc in the next st,* dc in the next st, dc in the next st, 2 dc in the next st* Repeat from * to * around. Slp-st to close. (48 sts)
What you should notice is that you are creating a stitch number set that matches the round number you are doing and each ending with an increase (2dc).
For example, in round 3 you created a set of 3 stitches – 1 dc, then 2dc. In round 4 you created a set of 4 stitches – 1 dc, 1 dc, 2 dc.
Thus, increasing round 5 would be a set of 5 stitches – 1 dc, 1dc, 1 dc, 2 dc.
Continue increasing in this manner until the diameter of your crown reaches the size indicated in the chart for the hat size you are crocheting.
** When using this method, your final stitch counts will be – 48 stitches for toddler, 60 stitches for child size, 72 stitches for teen/sm adult, and 84 stitches for lg adult/mens. These are the counts provided in the pattern below.
Your number of stitches and number of bead stitches will be based on the number of stitches you have once the crown is complete.
The number of beads stitches will be half the number of stitches you have once the crown is complete.
If you have used the increase method outlined above your number of bead stitches will be – 24 bst sts for toddler, 30 bst sts for child size, 36 bst stitches for teen/sm adult, and 42 bst sts for lg adult/mens. These are the stitch counts provided in the pattern below.
** Your counts may be different based on the crochet hook you use (if different from indicated in the pattern) and how many stitches you have once your crown reaches the diameter indicated in the chart for the size you are crocheting (if you use a method other than the one outlined above).
Body
Continue with color A.
Round 1: Ch 1 (starting from where you ended the crown of your hat) – ch does not count as a stitch, sc in the blo of each st around, slp-st to close. (48 sts), (60 sts), (72 sts), (84 sts)
Rounds 2-10: Ch 1 (starting from where you slip stitched to close) – does not count as a stitch, sc in the same st and in each st around, slp-st to 1st sc at the beginning of the round to close. (48 sts), (60 sts), (72 sts), (84 sts)
~ this section should measure approximately 2.75-inches in length.
Round 11: Cut color A and change to color B, ch 2, dc in the first sc, bst, *skip the next sc, dc in the next sc, bst*
Repeat from * to * around, slp-st to close. (24 bst sts), (30 bst sts), (36 bst sts), (42 bst sts)
Round 12: Cut color B and change to color A, ch 1, sc in first st and in each st around, slp-st to close. (48 sts), (60 sts), (72 sts), (84 sts)
Round 13-22: Ch 1,sc in the same stitch and in each st around, slp-st to close. (48 sts), (60 sts), (72 sts), (84 sts)
~ this section should measure approximately 2.75-inches in length.
Round 23: Cut color A and change to color B, ch 2, dc in the first sc, bst, *skip the next sc, dc in the next sc, bst*
Repeat from * to * around, slp-st to close. (24 bst sts), (30 bst sts), (36 bst sts), (42 bst sts)
Brim
Switch to hook size F/5-3.75mm.
Round 1: Cut color B and change to color A or C, ch 1, *sc in each of the next 2 sts, 2 sc in the next stitch* Repeat from * to * around, slp-st to close. (72 sts), (84 sts), (96 sts), (108 sts)
Rounds 2-6: Ch 1, sc in each st around, slp-st to close. (72 sts), (84 sts), (96 sts), (108 sts)
Round 7: Ch 1, slp-st in each sc around, slp-st to close. (72 sts), (84 sts), (96 sts), (108 sts)
~ length of brim alone should be approximately 1.5-inches in length.
~ Brim should start to curl up on it’s own, but if it doesn’t you can roll it up manually.
If you have trouble keeping the brim rolled, you can leave a long tail a the end of the hat and use the tail to make tak stitches along the top of the rolled brim to ensure that it will stay.
Shamrock Appliqué
For a full photo tutorial please see: How to Crochet a Shamrock Appliqué.
Use hook size I/9-5.5mm and yarn color of your choice.
Leaves
Make a magic ring -OR- Ch 3 and slp-st into the first ch to form a ring.
NOTE: Be sure to create a large ring if you are doing the 4-leaf clover as it requires more stitches than the 3-leaf clover.
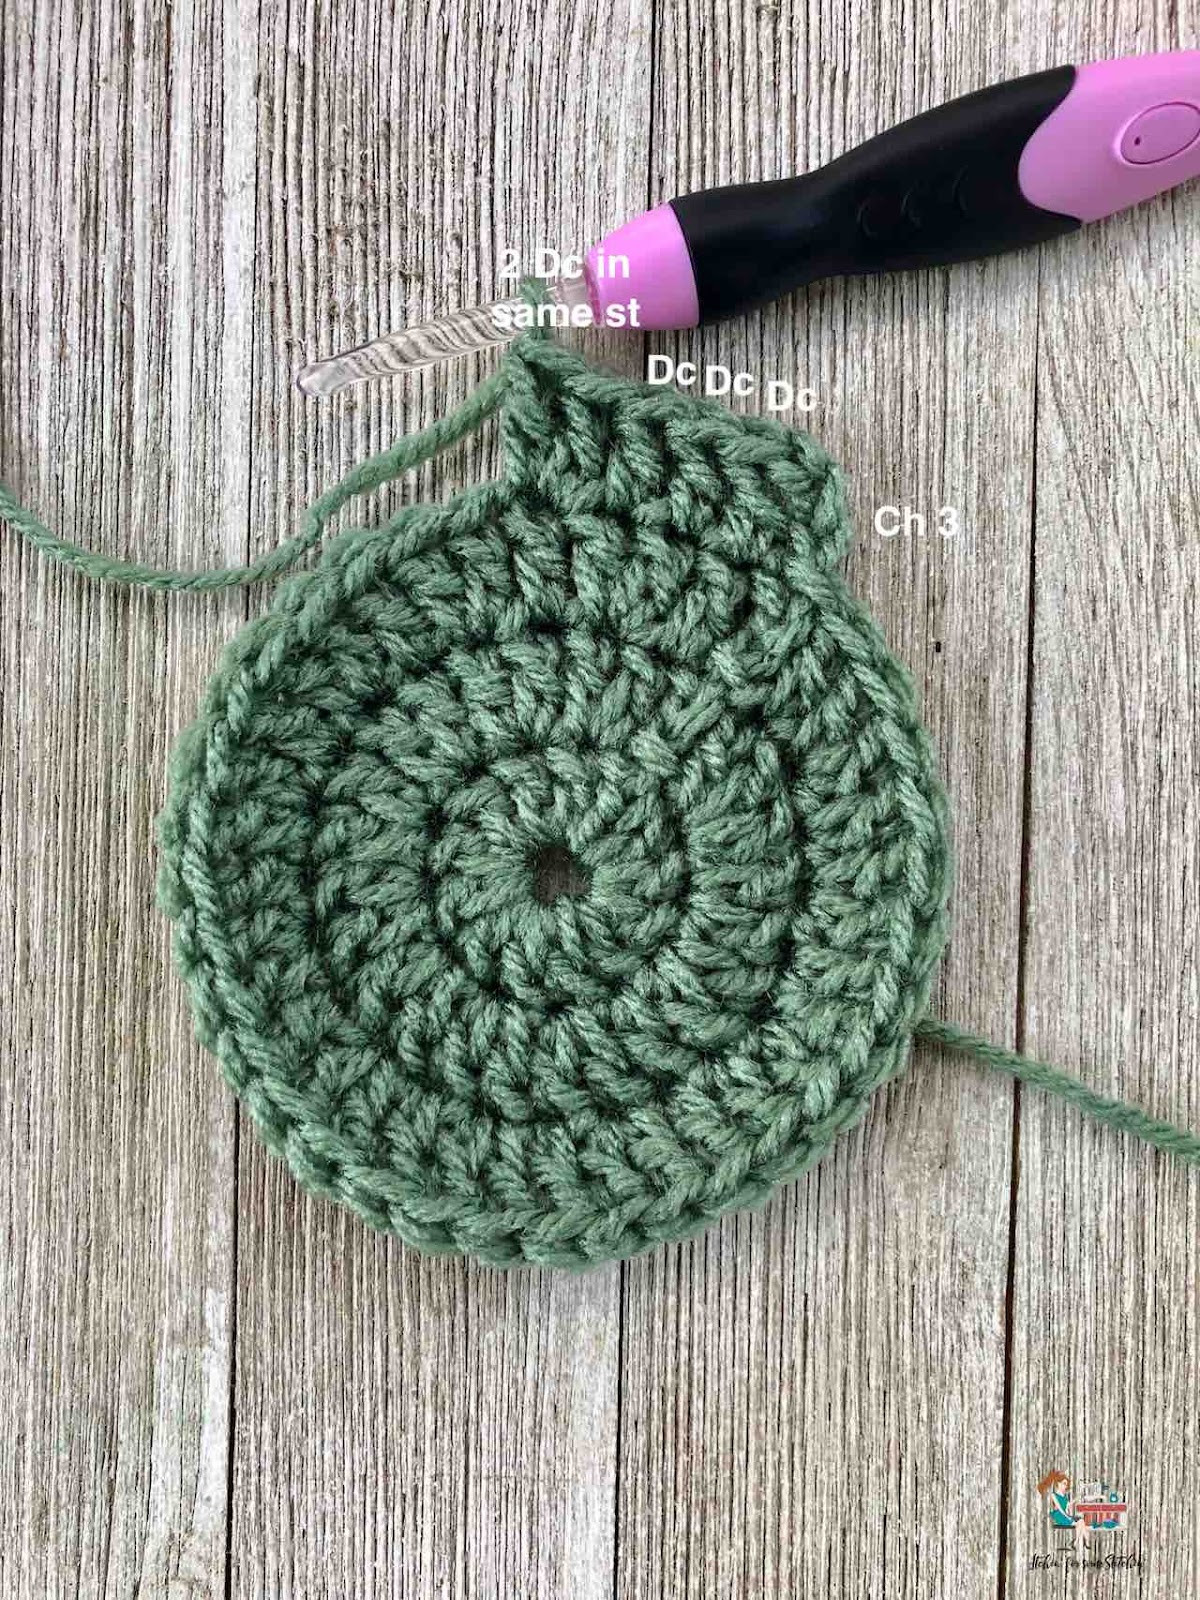
*Ch 3 (counts as one tr), make 2 tr into the ring, slp-st into the little bump on the side of the 2nd tr, ch 3 (counts as one tr), make 2 tr into the ring, slp-st into the ring to close*. You have just made one leaf of the shamrock.
NOTE: To find the bump on the 2nd tr, turn your work 90-degrees to the right. There should be two bumps, the top one may be covered by your yarn. You can slip-stitch into either bump. The top one will give you only a slight dip and the 2nd one will give you a deeper dip.
Repeat from * to * two more times to make a 3-leaf clover.
-OR-
Repeat from * to * three more times to make a 4-leaf clover.
Slip-stitch into the ring to finish off the last leaf.
NOTE: If you used the magic ring, be sure to pull the yarn end tight to close up the hole.
Stem
After slip-stitching into the ring, do not bind off. Continue on by chaining 11.
Turn work, slp-st into the 2nd ch from the hook and in each chain across until you are back to the clover leaves.
Then slp-st to the back of the clover to secure the stem.
If you want to use yarn for seaming the shamrock to your hat, then you can cut your yarn leaving a long tail (at least 12-18 inches) for sewing.
Finishing:
Secure the starting tail to the back of the shamrock and sew the applique to the bowler hat using coordinating thread (if you use this method, then also secure the other tail on the shamrock) or the long tail you left attached to the shamrock.
There, that wasn’t so bad, was it?
I know it may seem a little complicated, but I honestly think the hardest part is crocheting in the round, which is why I think this should be considered an advanced beginner pattern.
But… if you can get that part down, then you can easily do this pattern!
Just give it a try. 🙂
Please Share!
Until next time… Happy Crocheting!


Looking for fun crochet community filled with lots of crafty inspiration?
[list style=”style6″]
[li]Join Our New Facebook Group – Itchin’ for some Stitchin’ Beginner Crochet Community[/li]
[/list]
(Experienced crocheters also welcome!)