This post provides a comprehensive guide on adding a new stitch while knitting. It covers step-by-step instructions, useful tips, and visual illustrations, helping both beginners and experienced knitters master this technique. Whether you’re looking to expand your knitting skills or troubleshoot dropped stitches, this resource offers valuable insights to enhance your knitting projects.
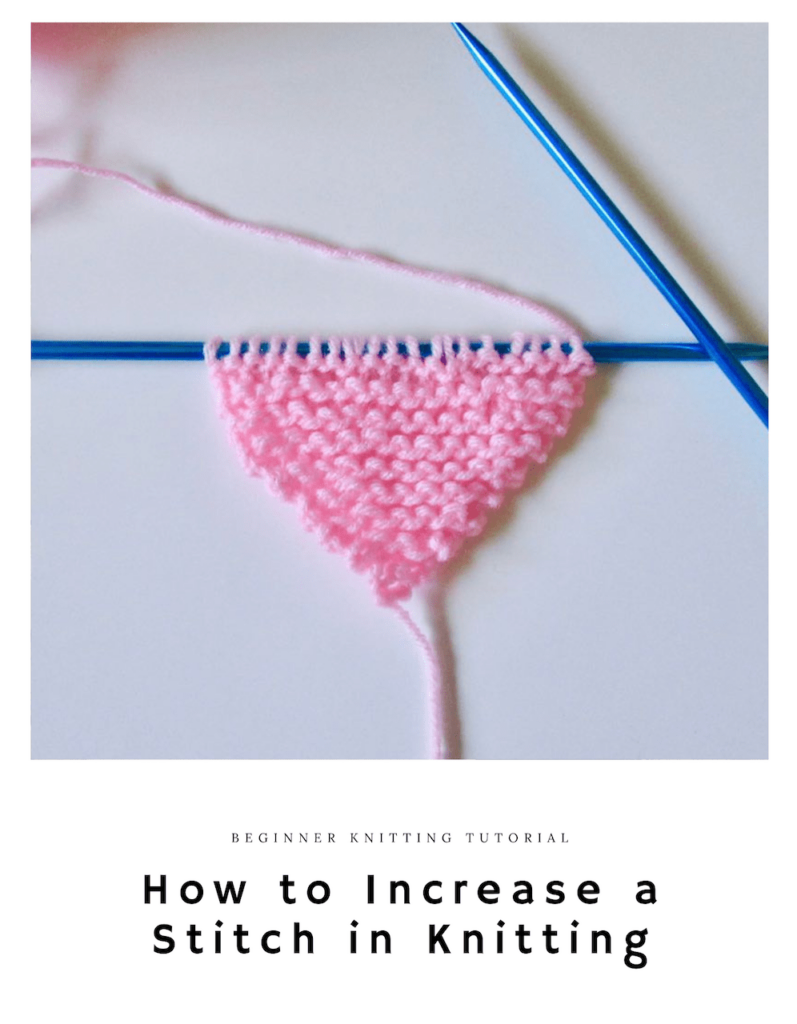
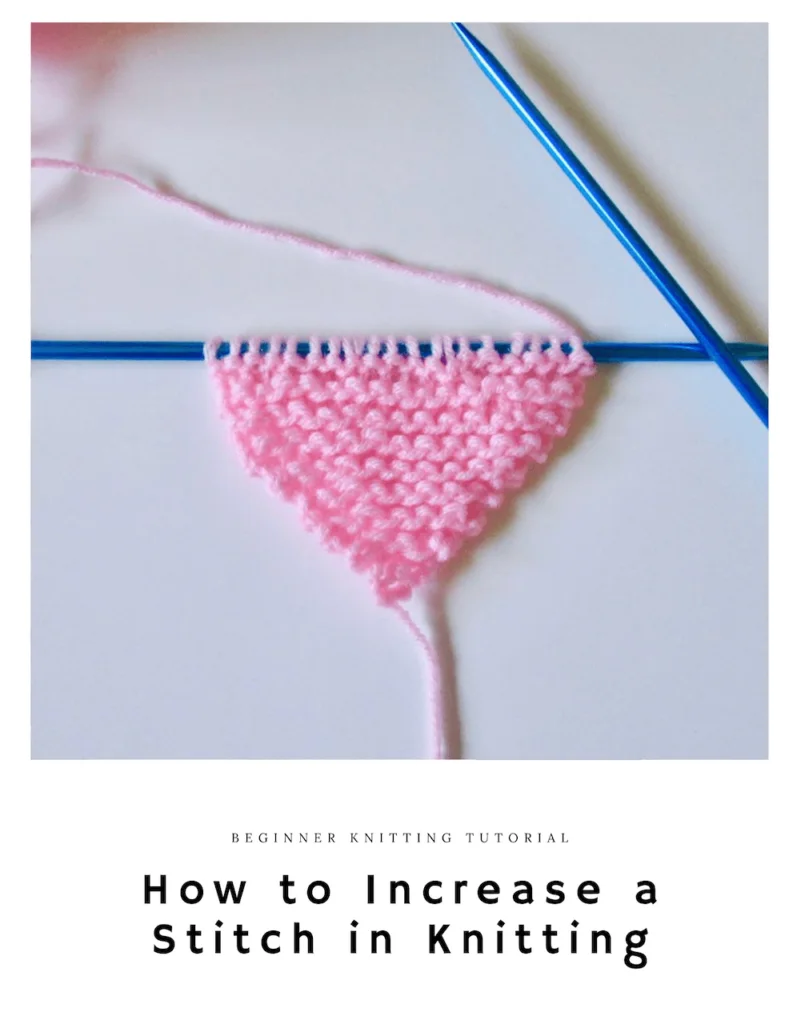
Okay, folks today I want to show you how to increase a stitch in knitting. In other words, how to add a stitch.
It is not only a very easy technique but an important one.
Adding a stitch in knitting is often simply called increasing.
Increasing, and it’s counterpart, decreasing (subtracting a stitch in knitting) is done to change the width of your project.
This allows you to make more complex and interesting knitted shapes.
For instance, if you’re knitting the arm of a sweater, you will need to increase stitches for the shoulder region and decrease stitches for the wrist.
Increasing and decreasing is how we tailor each knitted piece to our individual curves and shape so that they fit us perfectly!
How to Increase a Stitch in Knitting
Adding a stitch in knitting is a skill that is usually learned after you’ve mastered the knit and purl stitches.
If you need a review, please click on the link below:
To make an increase in knitting, you need to add an extra stitch (or loop) to your needle. This increases the length of your row by 1 stitch, thereby increasing the width.
There are multiple ways to do this and each method produces a unique “look”.
I want to share with you the method I find the most simple. And because it is so simple, I personally think it is the best one for knitting beginners to learn first.
This method generally goes by two different names.
1. The “knit in front & back”. This is often called the KFB Increase and can be seen as kfb or kf&b in knitting patterns.
2. The “bar increase”. Named this way because you’ll notice a slight horizontal bar of yarn between two existing stitches after the increase is made. It is denoted as “inc 1” in patterns.
I personally prefer the bar increase, so that is the name I will use in this tutorial.
The Bar Increase is a simple and versatile increase that can be used to shape garments, create decorative patterns, or simply expand the width of your knitting.
Two Knitting Styles
If you don’t know, there are actually two styles of knitting. If you’d like to learn more about each, please click on the links below.
Some people can knit in both styles. I, unfortunately, am not one of them.
I only knit in the Continental style and thus, this tutorial is demonstrated in that style only.
However, ALL the steps are the same, just the movements to produce those steps are slightly different per style.
Thus, you should be able to complete the knitting increase from this tutorial even if you knit in the English style.
How to Increase a Stitch in Knitting: The Bar Increase
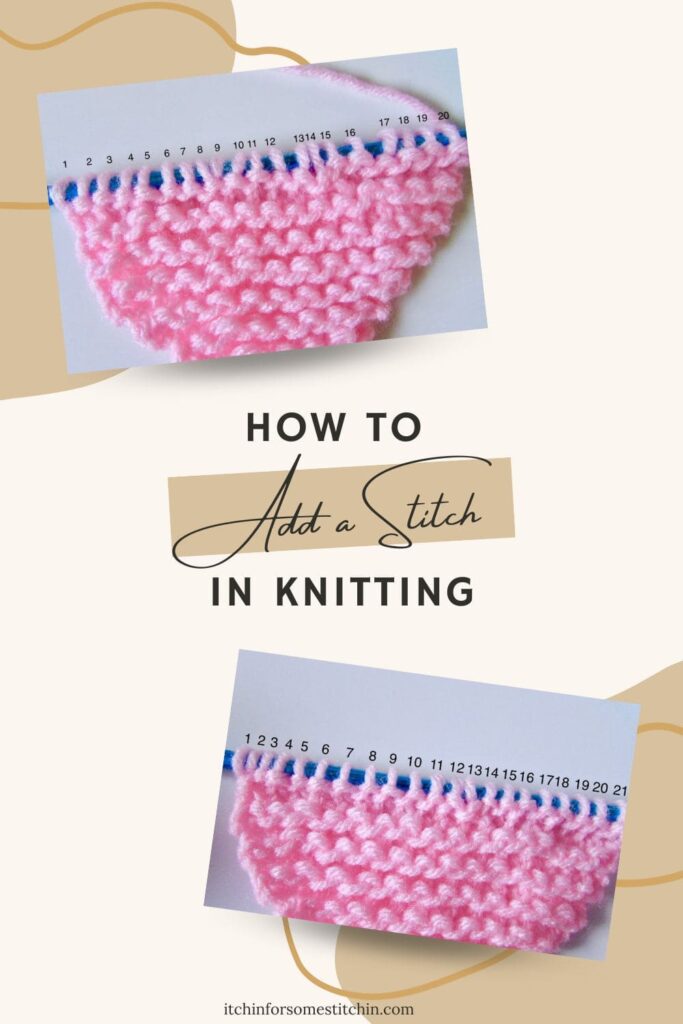
To start this tutorial, please note that I have 20 stitches in the top (or last) row of my knitted fabric. See the picture below.

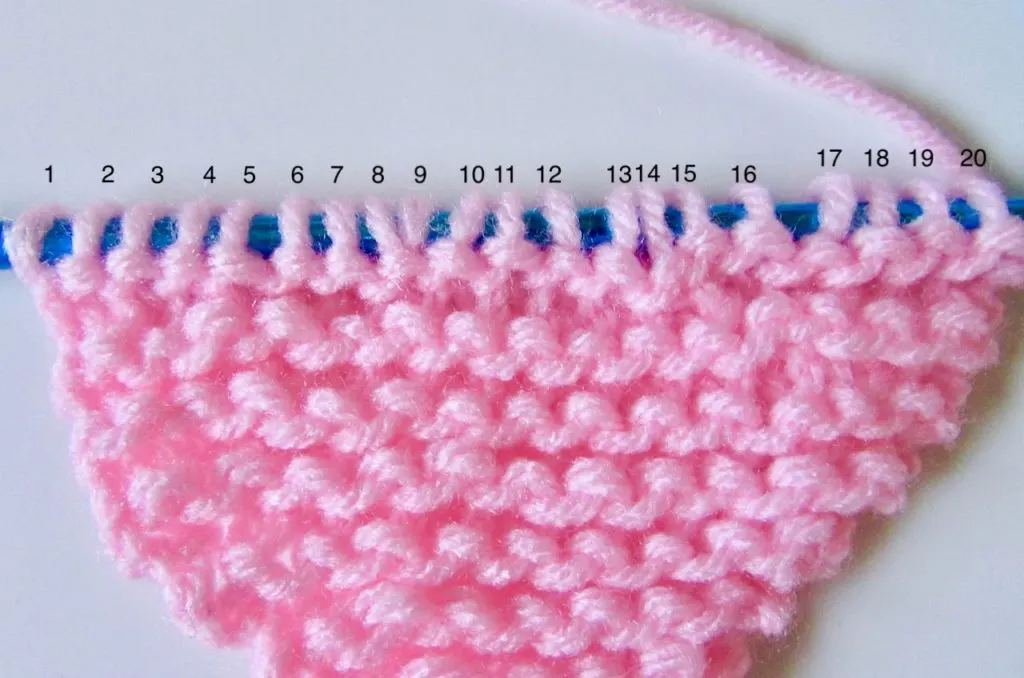
Now, I will show you how to increase the number of stitches by one.
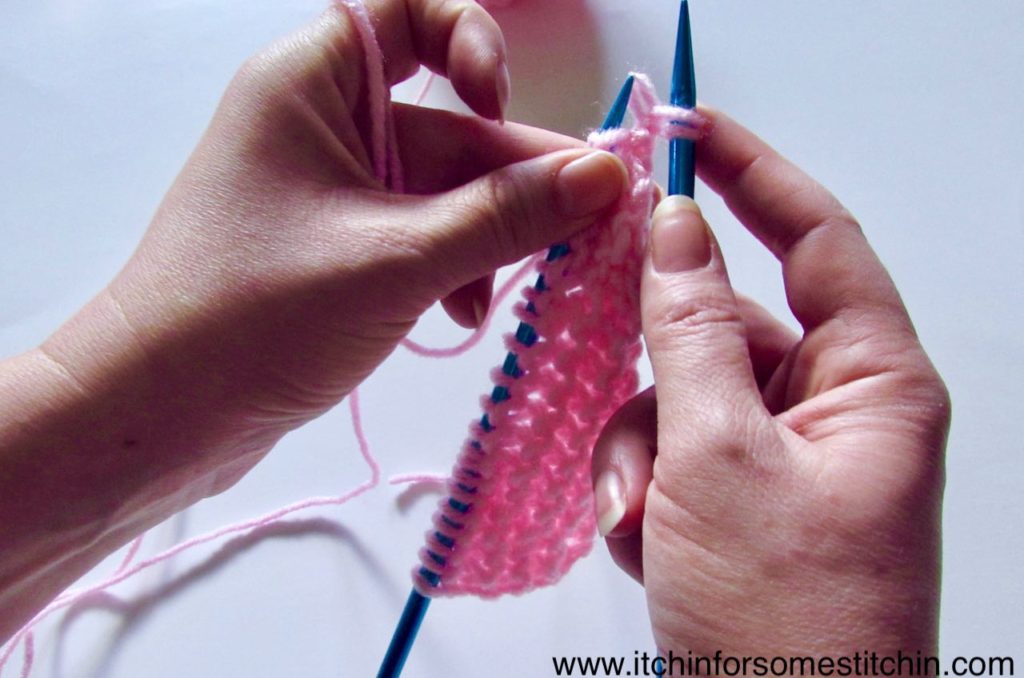
Step One: Knit a stitch like normal.
Insert your working needle through the back of the first stitch on the needle holding all of the stitches.
our working needle is the needle that is empty of stitches and the needle you will be transferring all your stitches to as you knit.
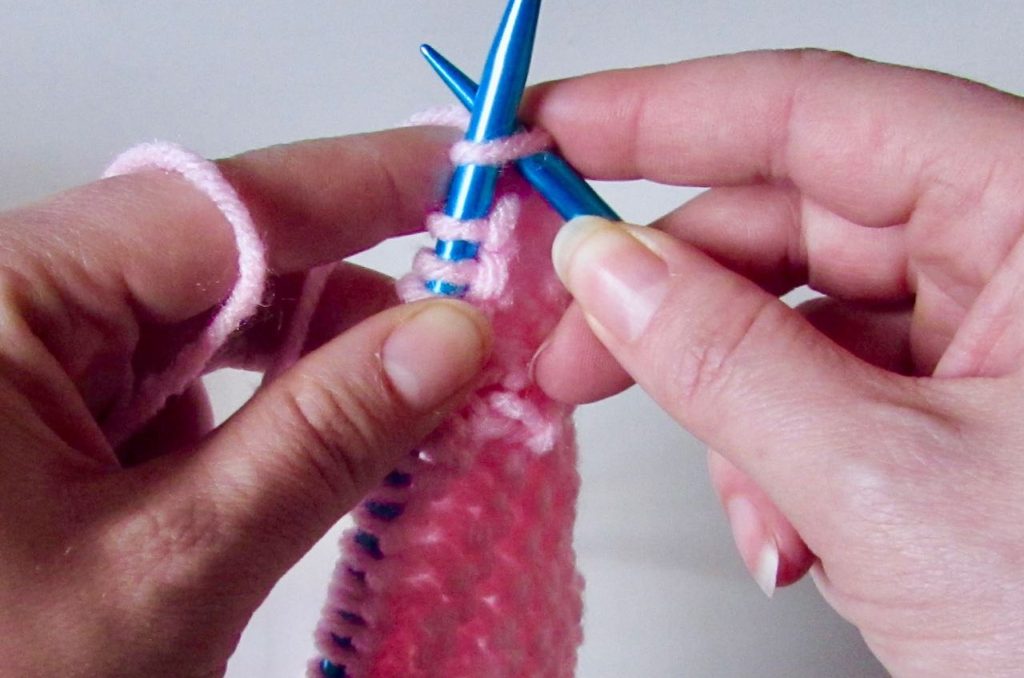

Yarn over and pull through.
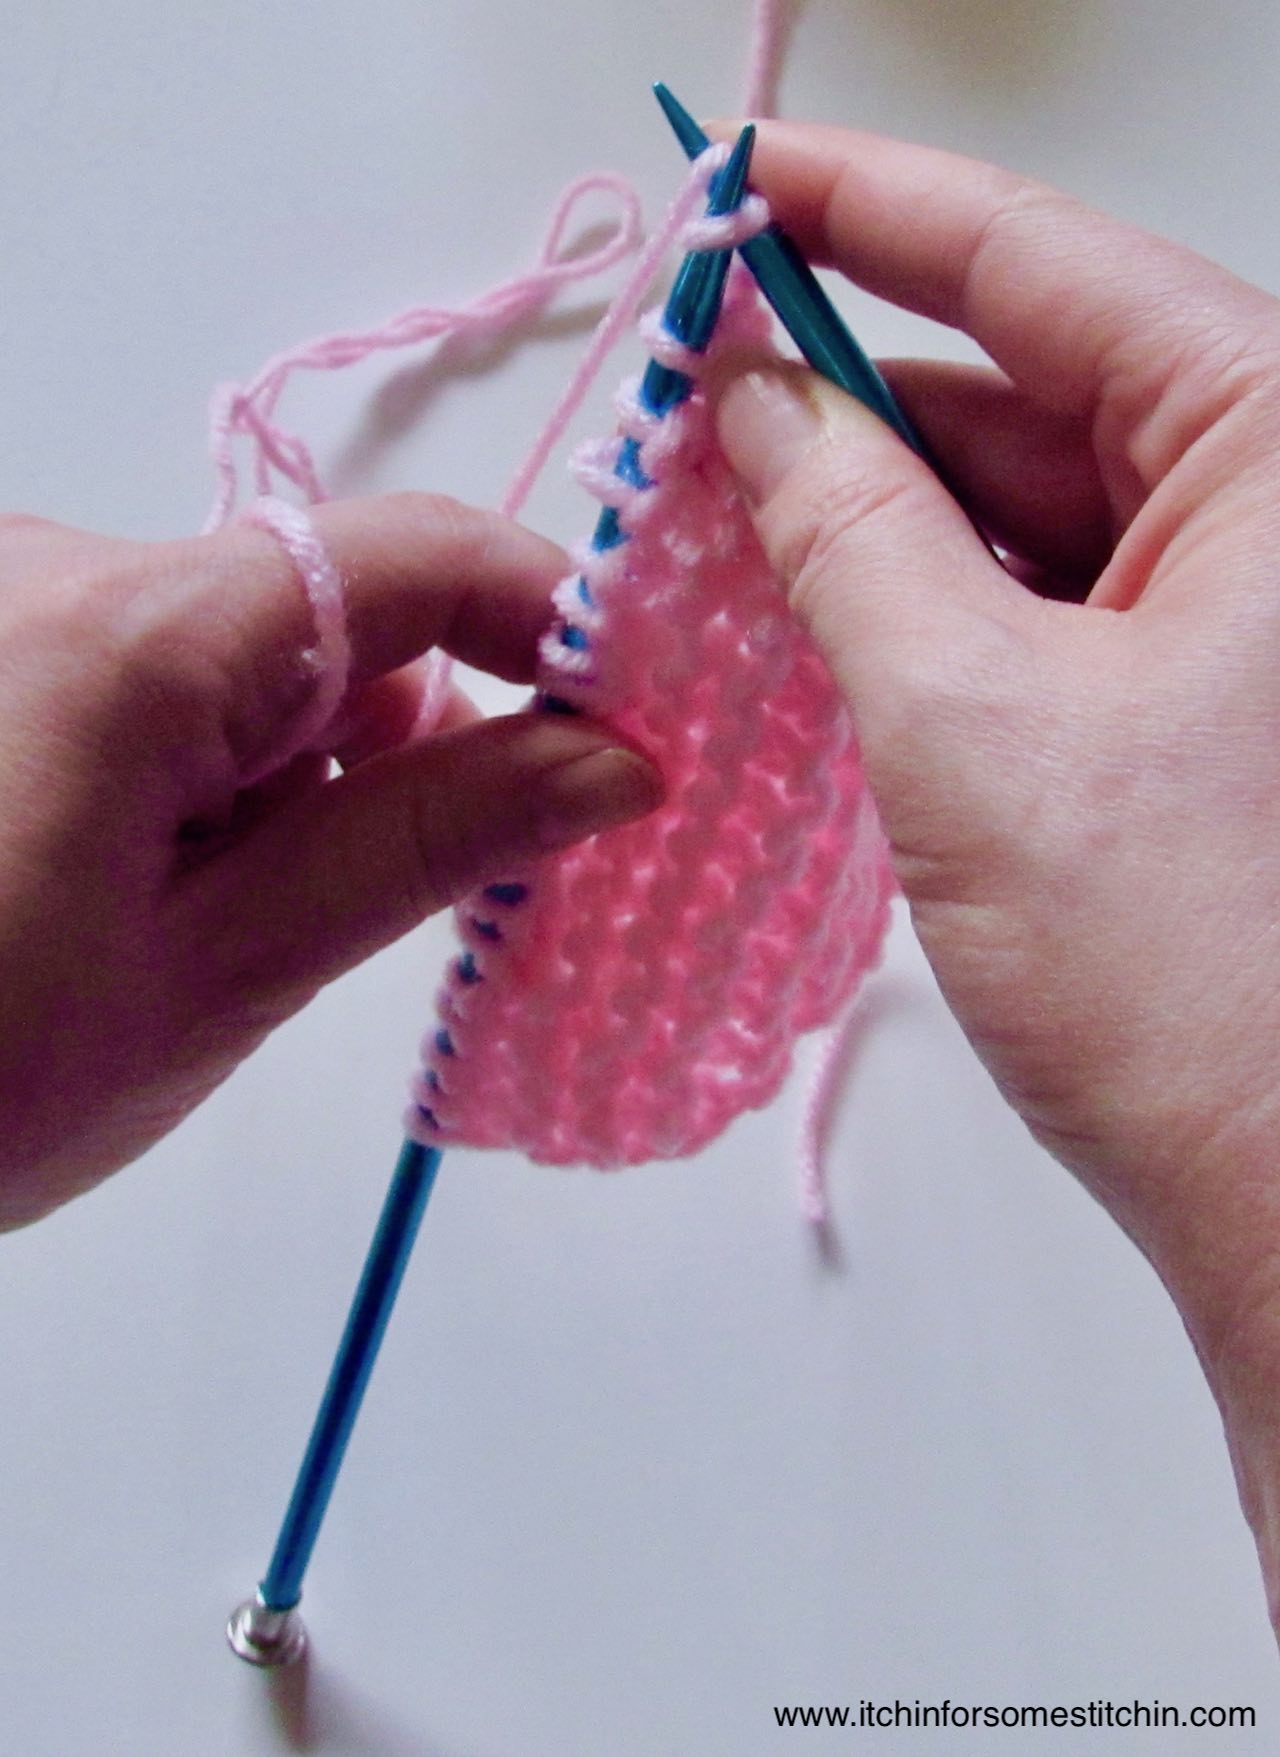

You should now have 1 stitch on your working needle.


But, do NOT remove the stitch from the needle holding all the stitches like you usually would when knitting.
Step Two: Knit another stitch like normal
Insert your working needle through the back of the first stitch on the needle holding the original stitches— it’s the same stitch you inserted your needle in during step one.
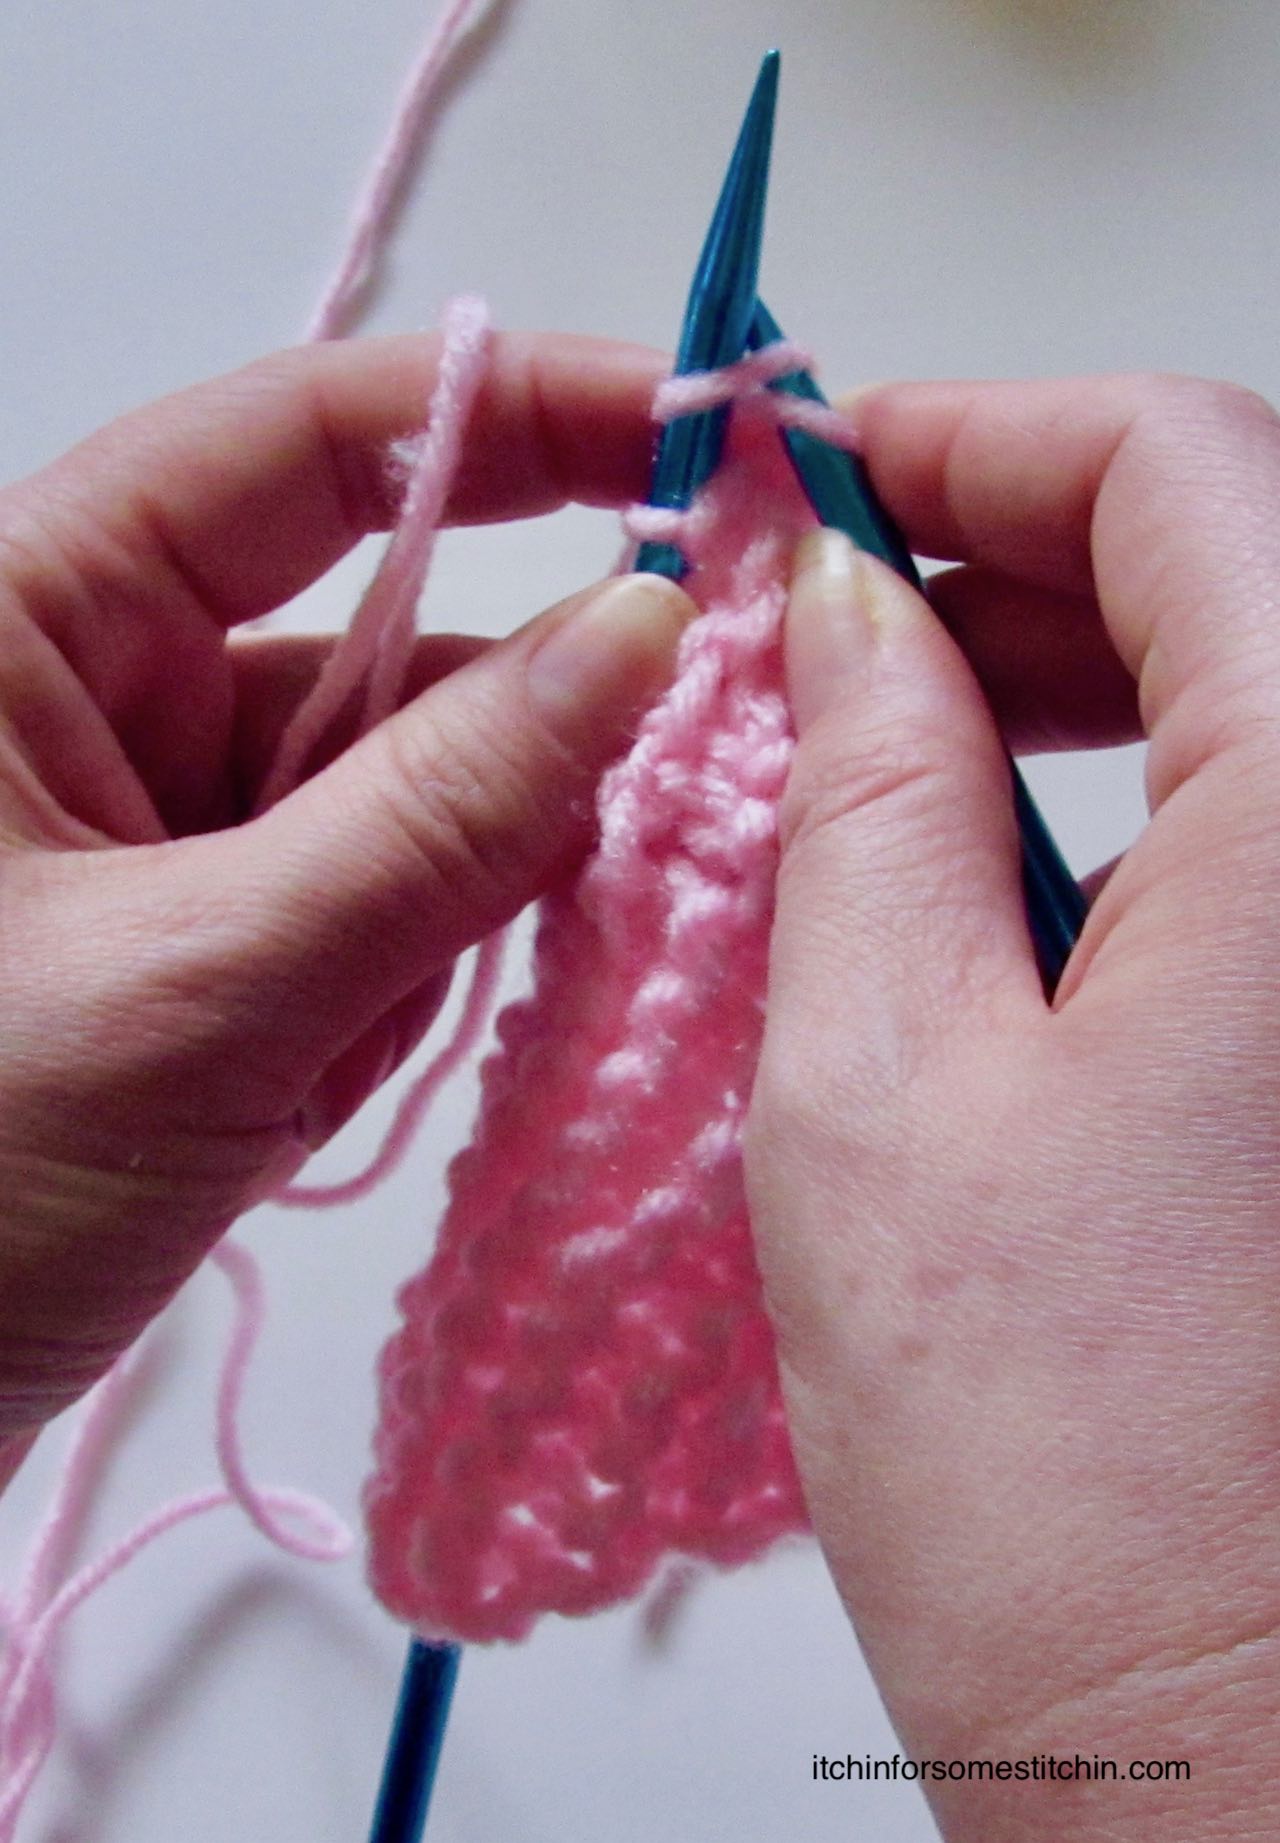
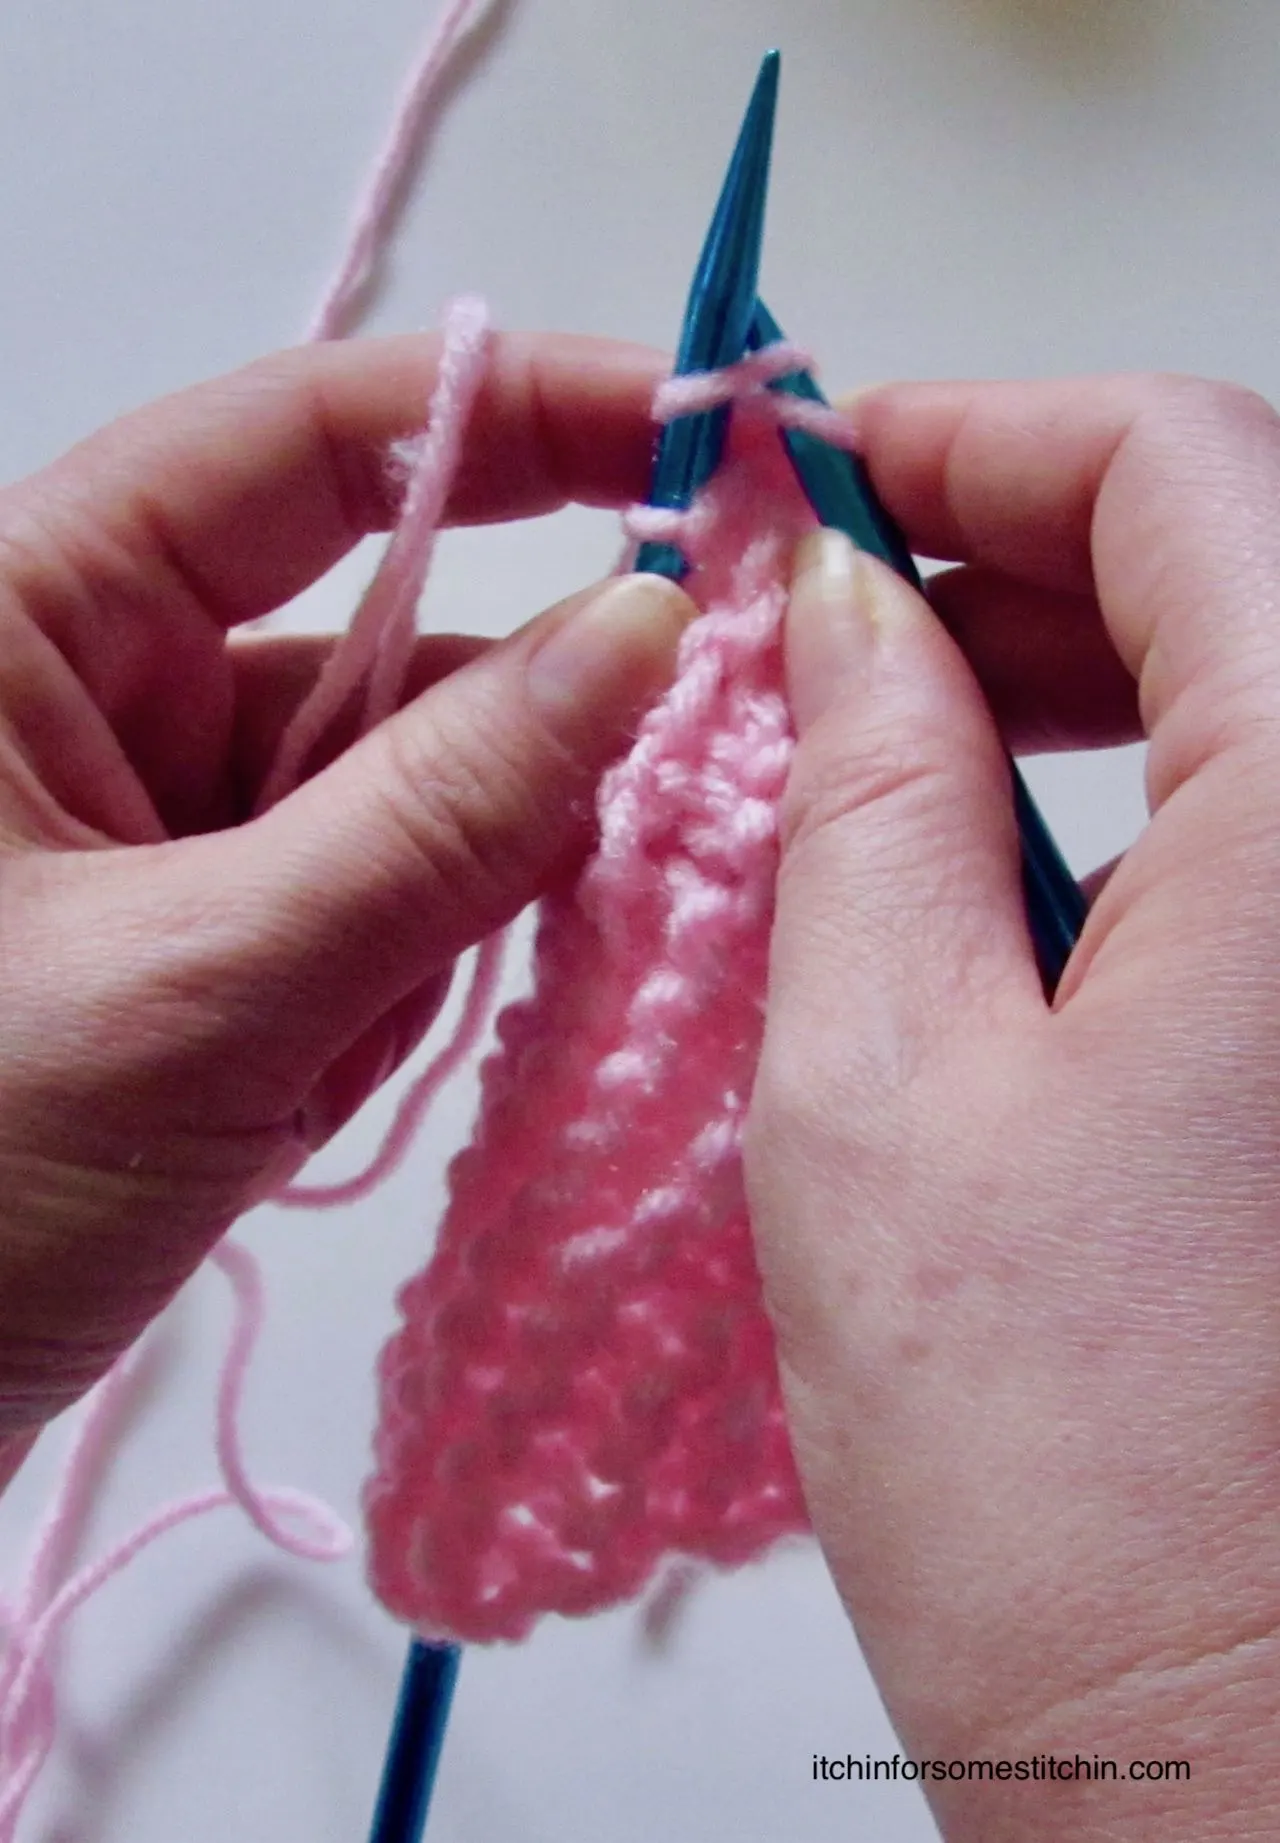
Yarn over and pull the new stitch through.
NOTE: In the photo below, the first stitch on the working needle got pushed up and is hidden under the loop through which I inserted the needle to make the second stitch.
However, it is there, I promise!

This time DO take the stitch off of the needle holding the original stitches like you usually would.
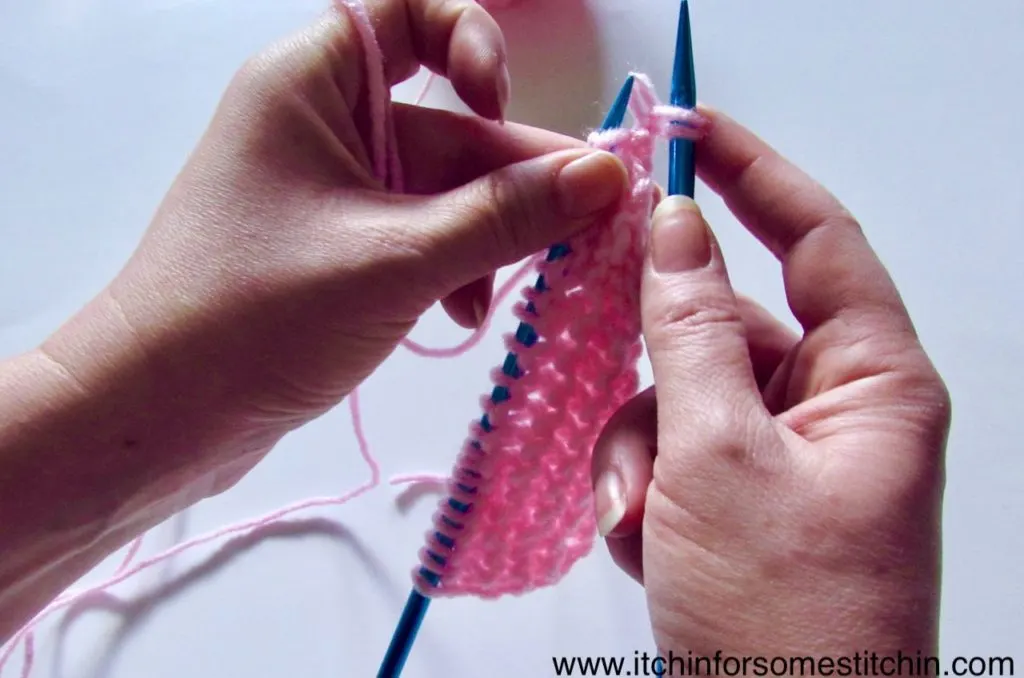
You should now have two stitches on your working needle.
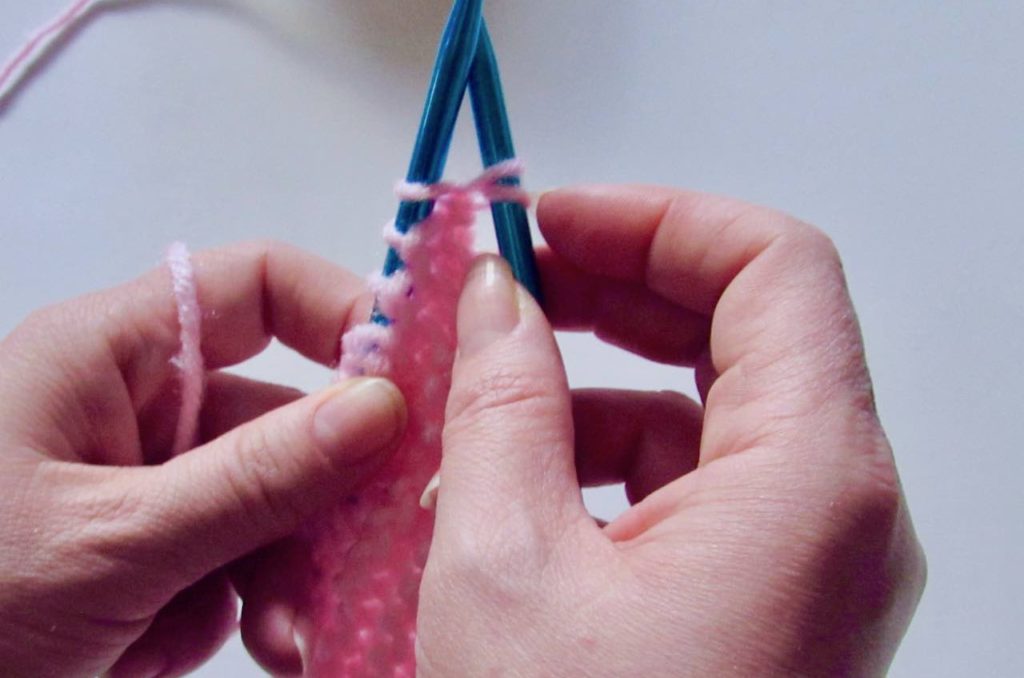

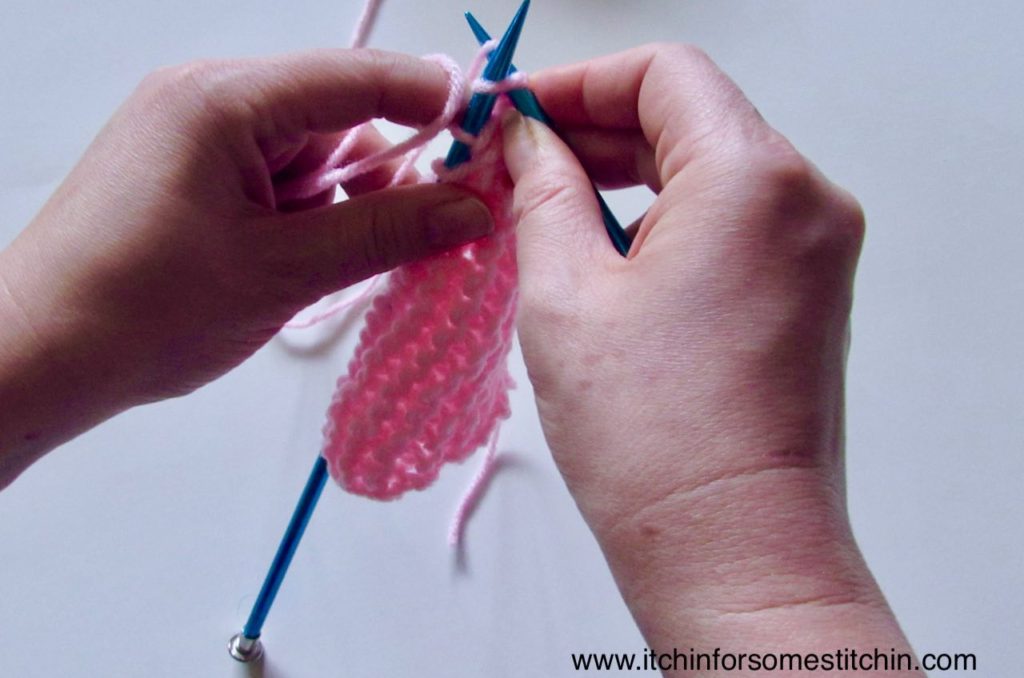
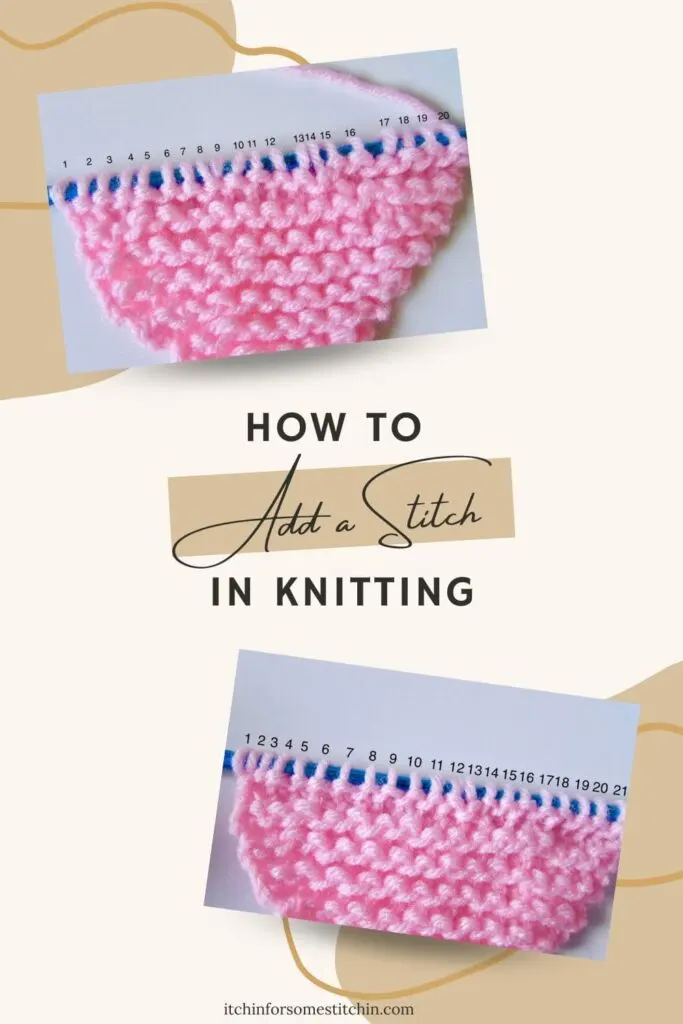
Now, if you complete knitting the entire row as normal, you will find that your stitch count has increased by one.

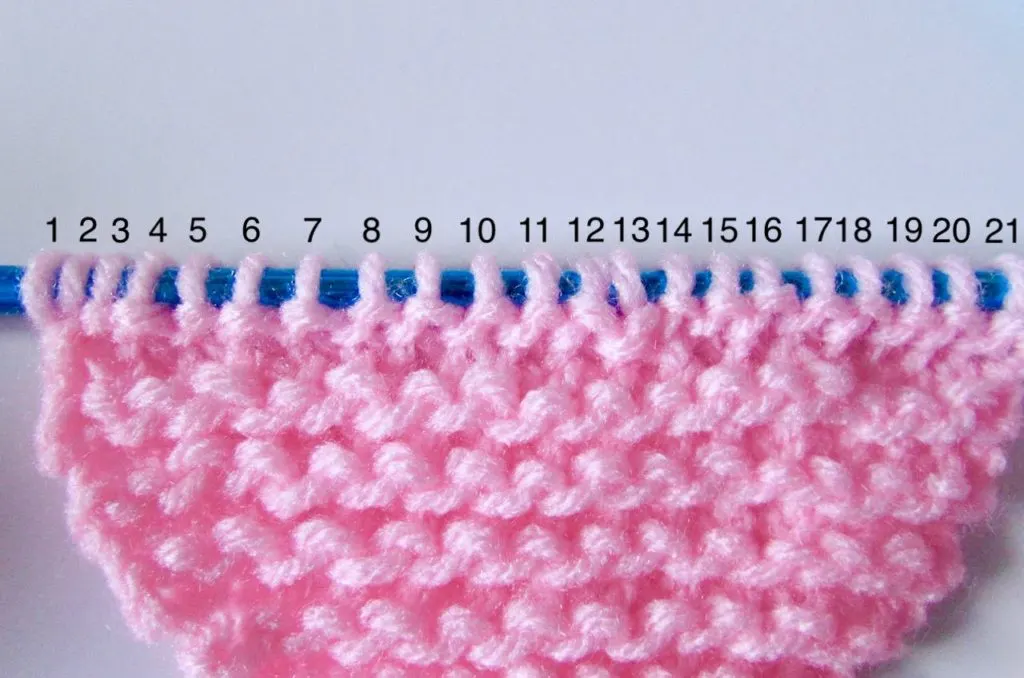
Remember, I started with 20 stitches, but after doing the bar increase I now have 21.
Love Pinterest?
I do!
PIN this pattern to your Pinterest boards for later.
You can also follow all my boards!
Tips & Important Notes
Okay, so that was super easy, right? Yes!
But… this post hasn’t been entirely honest with you. Don’t get me wrong, this IS how you do the Bar Increase in knitting.
However, the ends of all knitting projects are usually a little “wonky”. The stitches can get smashed and are usually not as pretty as the middle stitches.
*For this reason, you should actually add stitches in knitting to one of the middle stitches versus the edge stitches.
In this tutorial, I used the stitch on the very end to show you how to add another stitch. This was for ease of demonstration only.
Common FAQs
What is the “knit in front and back” method of adding a stitch in knitting?
As outlined in the post above, the “knit in front and back” (KFB) method or “Bar Increase” is a commonly used technique to increase stitches in knitting.
It involves knitting into the front of a stitch and then without removing it from the left needle, knitting into the back of the same stitch.
This creates a new stitch, effectively increasing the stitch count.
When should I use the KFB increase in my knitting project?
The KFB increase is often used when you want to add stitches to create shaping or increase the width of your knitting.
It is versatile and can be incorporated into various patterns and designs, such as sleeves, raglan increases, or decorative elements.
Are there any tips to ensure a neat KFB increase?
Here are a few tips to achieve a tidy KFB increase:
Can I use alternative methods to increase stitches instead of KFB?
Yes, there are other methods for increasing stitches, such as using the “make one” (M1) technique or yarn overs (YO).
Each method produces a different effect, so choose the one that best suits your project and desired outcome.
How can I incorporate Bar increases into stitch patterns?
When working with stitch patterns, such as cables or lace, it’s important to maintain the integrity of the pattern while increasing stitches.
Consult your pattern instructions or seek guidance from knitting resources to learn how to modify stitch patterns while incorporating Bar increases.
I have to admit that I absolutely LOVE this knitting increase method, especially for beginners, because it’s so easy.
Think about it, the only thing you need to know in order to do the bar increase is the most basic of knitting skills, the knit stitch.
That’s because it is basically making two knit stitches, but forgetting to pop off the working stitch the first time.
Simply amazing!
Just a minor tweak of such a simple skill that opens up a whole new world of project possibilities!
Remember, practice is key to mastering any knitting technique.
Embrace the versatility of the KFB, aka, the “Bar” increase method and explore its creative possibilities in your knitting projects.
Thank you for coming to my blog! By sharing my content and/or making a purchase you are making it possible for me to continue producing and sharing free content for everyone to enjoy. I sincerely appreciate your support!
Until next time… Happy Knitting!


Please Share!
Marcia Moody
Saturday 12th of June 2021
I am between a beginner & intermediate knitter. Thank you so much for your instructions. They were so easy to understand. So often when trying to learn various stitches I give up because the instructions become too confusing to follow. I will be looking forward to learning more from you. You are great!!